

If you’re a DIY enthusiast, you know the importance of having the right tools in your arsenal. And when it comes to woodworking, one tool that can make your life a lot easier is a pocket hole jig.
Whether you’re building a cabinet, a bookshelf, or a picture frame, a pocket hole jig allows you to create solid and secure joints quickly and easily.
To drill pocket holes, clamp your workpiece securely to a work surface. Adjust the depth collar on your pocket hole jig, then drill the pocket holes with a specialized step drill bit.
In this blog, we’ll show you how to use a pocket hole jig to drill perfect pocket holes every time. So, whether you’re a beginner or an experienced woodworker, read on to learn more!
Pocket Hole Basics
Pocket holes are a fast and easy way to join pieces of wood together.
Whether you’re building cabinets, shelves, or other furniture projects, pocket holes provide a robust, hidden joint requiring minimal clamping and no glue.
Tools and Materials Needed for Drilling Pocket Holes
You’ll need a few essential tools and materials to drill pocket holes, including a drill or driver, a pocket hole jig, pocket hole screws, and wood glue (optional).
Here’s a closer look at each of these items:
- Drill/driver: You’ll need a drill or driver to make the pocket holes in your workpieces. A cordless drill or driver is a good choice because it provides the mobility to move around your work area without being tethered to an electrical outlet.
- Pocket hole jig: A pocket hole jig is a unique tool that guides your drill bit at the correct angle to create a pocket hole. Several types of pocket hole jigs are available, which we’ll cover in the next section.
- Pocket hole screws: Pocket hole screws are specifically designed for use with pocket holes. They have a particular thread pattern that pulls the workpieces tightly together and a flat head that sits flush with the surface of the wood. Pocket-hole screws come in various lengths and diameters to accommodate wood thicknesses.
- Wood glue: While not necessary, applying a small amount of wood glue to the joint before driving in the pocket hole screw can add extra strength.
Types of Pocket Hole Jigs
There are three main types of pocket-hole jigs. Pocket hole jigs clamp to the workpiece and attach to a drill press, and pocket holes are built into a specialized drill or driver.
Here’s a closer look at each type:
- Clamp-on pocket hole jigs: These jigs clamp directly to the workpiece and allow you to drill pocket holes at various angles. They’re easy to use and don’t require any additional tools, making them a good choice for beginners.
- Drill press pocket hole jigs: These jigs attach to a drill press and guide your drill bit at the correct angle to create a pocket hole. They’re more precise than clamp-on jigs but require a drill press to use.
- Built-in pocket hole jigs: Some drills and drivers have a built-in pocket hole jig that allows you to drill pocket holes without using a separate jig. These are the most convenient type of pocket hole jig, but they may not be as precise as standalone jigs.
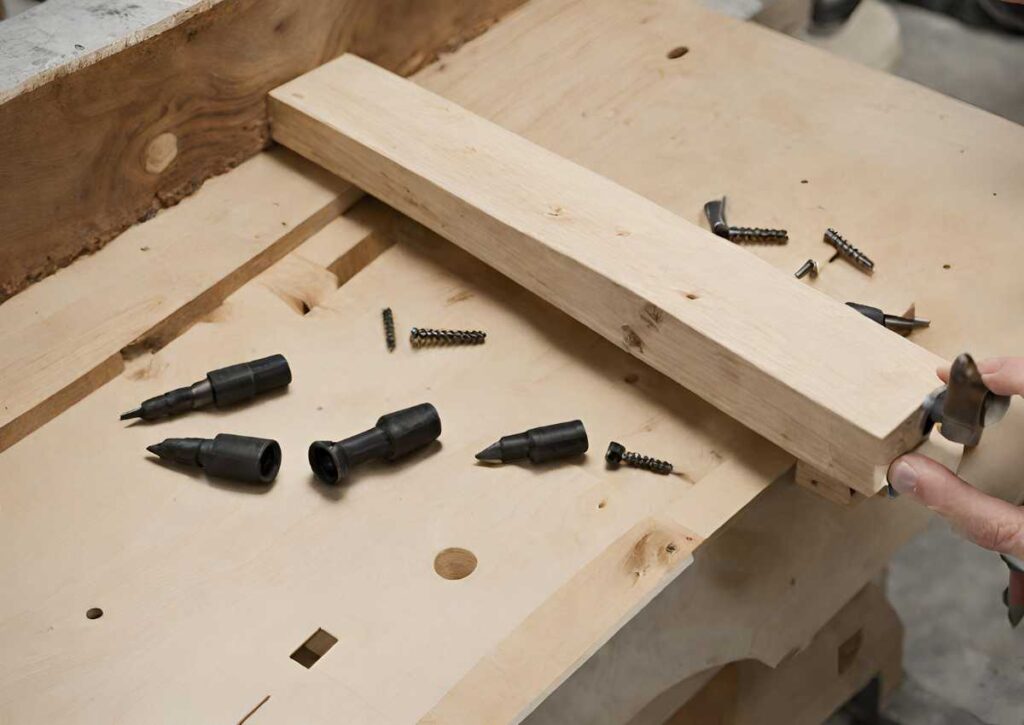
Choosing the Right Pocket Hole Screws
Choosing the appropriate pocket hole screws is essential for creating a solid joint. Here are a few things to consider when selecting pocket hole screws:
- Screw length: Choose a screw length long enough to go through the first piece of wood and into the second piece, but not so long that it protrudes out the other side.
- Screw diameter: The diameter of the screw should match the thickness of the wood you’re joining.
- Screw thread: Pocket-hole screws have a unique thread pattern that pulls the workpieces tightly together. Coarse-threaded screws are designed for softwoods like pine and cedar, while fine-threaded screws are intended for hardwoods like oak and maple.
- Screw head: Pocket-hole screws have a flat head that sits flush with the surface of the wood. Choose a screw head that’s the appropriate size and shape for your project.
Preparing Your Workpiece
Before you start drilling pocket holes, it is essential to prepare your workpiece correctly.
This involves measuring and marking your workpiece, securing it for drilling, and determining the correct pocket hole depth.
Measuring and Marking Your Workpiece
The first step in preparing your workpiece is to measure and mark where you want to drill the pocket holes. You will need a tape measure, a pencil, and a square to do this.
Start by measuring and marking the locations where you want to place the pocket holes. The spacing between the pocket holes should be based on the thickness of the workpiece.
As a general rule, the distance from the edge of the workpiece to the center of the first pocket hole should be twice the thickness of the workpiece.
For example, if the workpiece is 3/4 inch thick, the distance from the edge to the center of the first pocket hole should be 1 1/2 inches.
Once you have marked the locations for the pocket holes, use a square to draw a line across the width of the workpiece at each mark.
This will ensure that the pocket holes are drilled at the correct angle.
Securing Your Workpiece for Drilling
The next step is to secure your workpiece for drilling. This is important because it prevents the workpiece from moving during the drilling process, which can result in inaccurate pocket holes.
To secure the workpiece, you can use a variety of clamping methods. For example, you can use a bench or face clamp to hold the workpiece in place.
Alternatively, you can use a pocket-hole jig with a built-in clamp to secure the workpiece.
Before you start drilling, make sure that the workpiece is securely clamped and will not move during the drilling process.
Determining the Correct Pocket Hole Depth
Determining the correct pocket hole depth is the final step in preparing your workpiece. This is important because it ensures that the screw will go in straight and not come out on the other side of the workpiece.
The thickness of the workpiece determines the pocket hole depth. Most pocket hole jigs have a depth setting that you can adjust based on the thickness of the workpiece.
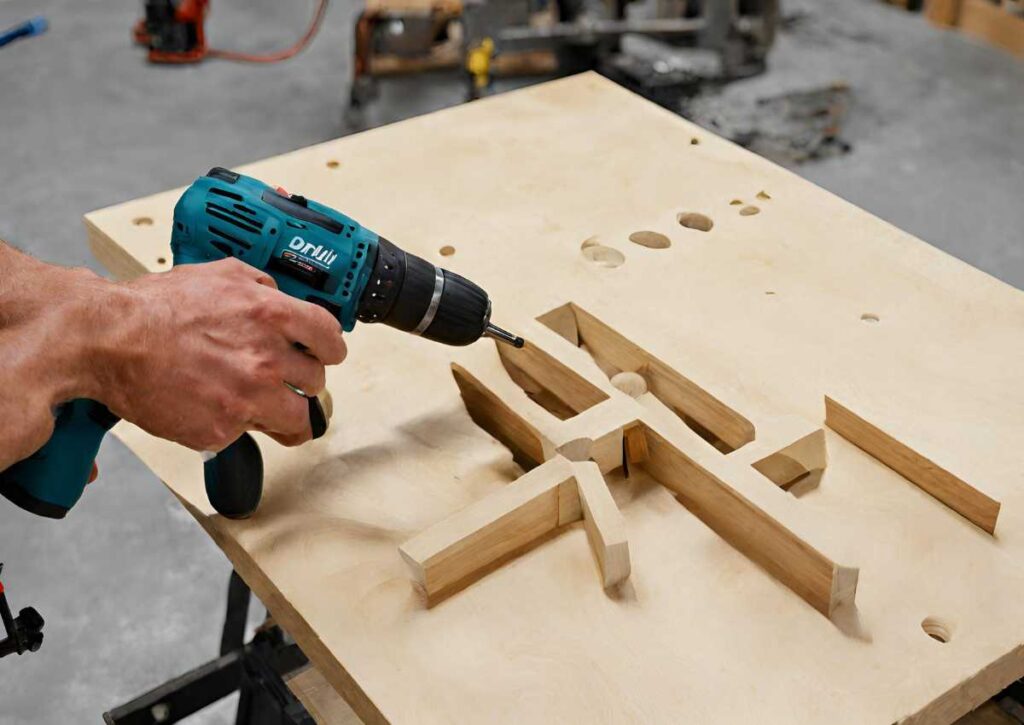
Drill Pocket Holes
Pocket holes are a popular and effective way to join two pieces of wood together at an angle. It’s a straightforward process that can be done with the help of a pocket-hole jig.
Setting up the Pocket Hole Jig
The first step in drilling pocket holes is to set up the pocket hole jig. The jig is a tool that helps you drill angled holes in the wood. Follow these steps to set up the jig:
- Choose the right size: Most pocket hole jigs come with different hole sizes. Make sure to choose the right size for the thickness of the wood you’re using.
- Adjust the drill guide: The drill guide determines the angle of the pocket hole. Adjust it according to the grade you want to drill.
- Clamp the jig: Once you’ve adjusted the drill guide, clamp the jig to the workpiece securely.
Aligning the Workpiece with the Jig
Once the jig is set up, it’s time to align the workpiece with the jig. Proper alignment is crucial for drilling accurate pocket holes. Here’s how to do it:
- Position the workpiece: Place the workpiece on the jig with the surface you want to drill facing up.
- Align the mark: If you’ve marked the position of the pocket hole, align it with the drill guide on the jig.
- Align the edge: Align the edge of the workpiece with the fence on the jig. The fence ensures that the hole is drilled in the correct position.
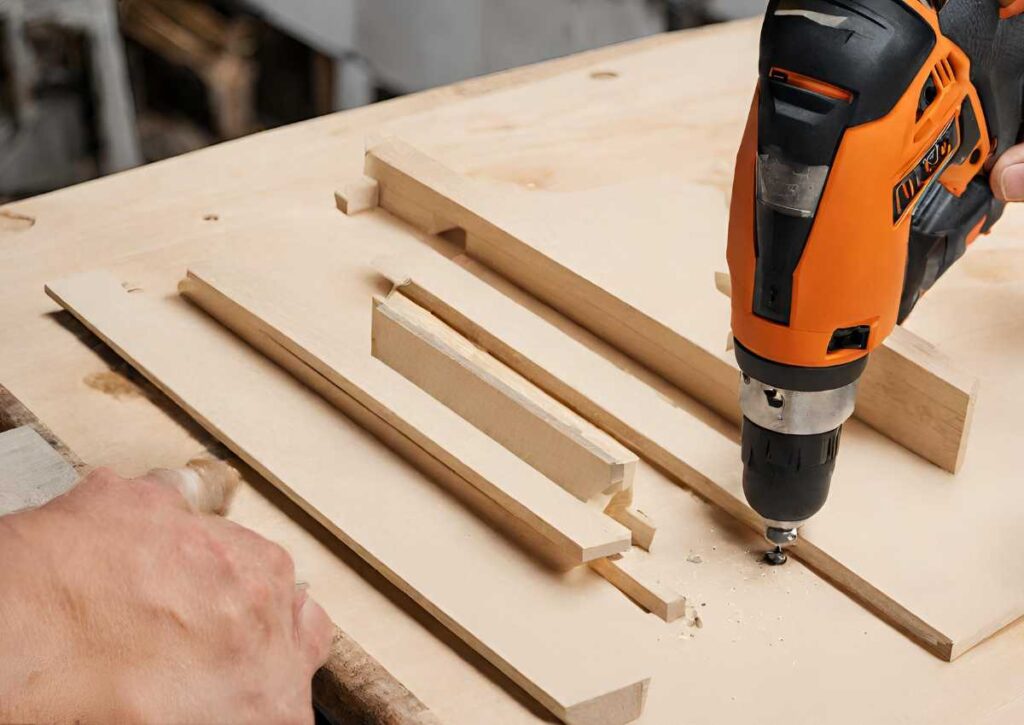
Drilling the Pocket Hole
With the jig and workpiece aligned, it’s time to drill the pocket hole. Here’s how to do it:
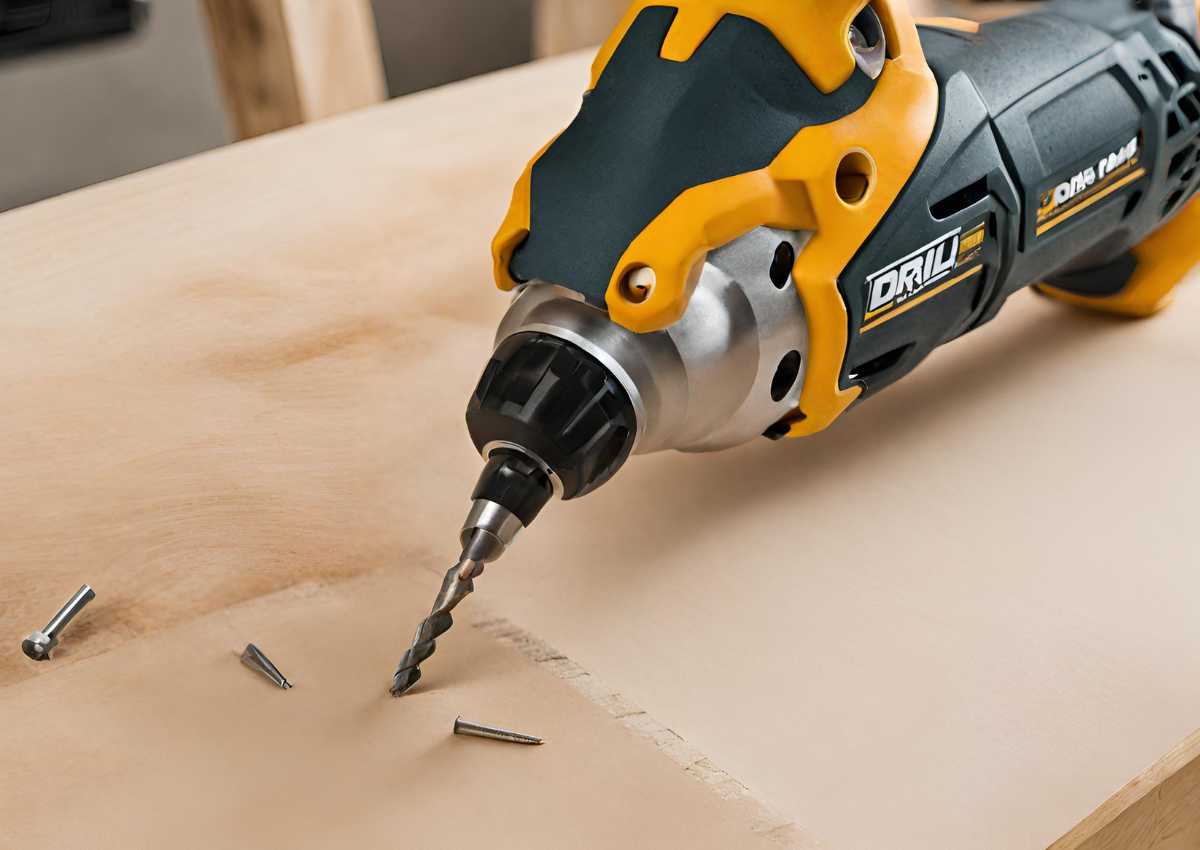
- Choose the right drill bit: Most pocket hole jigs have a specialized drill bit. Use this drill bit or a similarly-sized one to drill the hole.
- Drill the hole: Place the drill bit in the guide hole on the jig and drill the hole. Be sure to apply consistent pressure and drill straight through the wood.
- Remove the wood chips: After drilling the hole, remove any wood chips from the pocket hole and surrounding area.
Tips for Drilling Clean and Accurate Pocket Holes
Here are some tips to help you drill clean and accurate pocket holes:
- Use a sharp drill bit: A dull drill bit can cause the wood to splinter and create a messy hole. Make sure to use a short drill bit.
- Drill at the right speed: Drilling too fast or too slowly can affect the quality of the hole. Find the correct rate for your drill and stick to it.
- Use a backing board. If the wood you’re drilling is prone to splintering, place a backing board under it to prevent tear-out.
- Keep the jig clean. Sawdust and debris can accumulate in the jig, affecting accuracy. Keep the jig clean and free of debris.
Following these steps and tips, you can quickly drill clean and accurate pocket holes.
Assembling with Pocket Hole Joinery
Pocket-hole joinery is an efficient and straightforward way to assemble woodworking projects.
It involves drilling a pocket hole at an angle into one workpiece and joining it to another workpiece with a pocket hole screw.
Preparing workpieces for assembly
Before assembling with pocket hole joinery, it’s essential to ensure that your workpieces are prepared correctly.
This includes cutting the boards to the desired length and width, ensuring they are square, and sanding them to a smooth finish.
It’s also crucial to accurately mark the pocket holes’ location on each workpiece. Use a jig specifically designed for drilling pocket holes for consistent results.
The jig will hold the workpiece securely and provide a guide for drilling the hole at the correct angle.
Applying glue and clamping
Applying glue to the joint before driving in the pocket hole screws will make for a much stronger joint. However, you must use glue sparingly to avoid it squeezing out of the joint and onto your workpiece.
Use clamps to hold the workpieces together to ensure the joint stays in place while the glue dries. It’s crucial to place clamps correctly to prevent the joint from shifting.
Driving pocket hole screws
Once the glue has dried, it’s time to drive in the pocket hole screws. Use a drill or driver with a clutch setting to avoid overdriving the screws and causing the joint to split.
Ensuring solid and square joints
To ensure that your joints are solid and square, use a square to check that the workpieces are at a 90-degree angle to each other.
If the joint is not fair, use a clamp to adjust the position of the workpiece before driving in the screws. It’s also essential to choose the right length of screws for the thickness of the workpiece.
Using a screw that’s too long can cause the joint to split, while using one that’s too short will not provide enough strength.
Troubleshooting Common Issues
Even though pocket holes are an efficient and quick way to combine wood pieces, you might face some common issues that need help with while drilling pocket holes.
Preventing tear-out and splintering
To prevent tear-out and splintering, use a backer board behind the workpiece while drilling. The backer board will support the workpiece and prevent tear-out or splintering from occurring.
Using a sharp drill bit is also crucial for preventing tear-out and splintering. Always use a sharp drill bit and replace it when necessary.
Resolving issues with screw length and penetration
To avoid this issue, make sure you choose the right screw length based on the thickness of the workpiece.
You can also use a depth collar on the drill bit to control the pocket hole’s depth, ensuring that the screw is the correct length and penetrates the workpiece properly.
Conclusion
As we come to the end of this blog, let’s take a moment to review the key points we’ve covered on how to drill pocket holes.
Pocket-hole joinery is a versatile and efficient method of joining wood that can enhance the quality and durability of your woodworking projects.
You can create solid and seamless joints quickly and easily by following the steps we’ve outlined.
Remember to choose the right pocket hole jig for your project and adjust it to the appropriate settings.
Use the right type and size of screw, and drill the pocket hole at the correct angle and depth. Finally, use glue and clamps to ensure a tight and secure joint.
Incorporating pocket hole joinery into your woodworking projects can help you take your skills to the next level and create high-quality, professional-looking pieces.
You can achieve beautiful and long-lasting results with practice and attention to detail. Thank you for reading, and happy woodworking!
FAQs
Do you need a particular drill bit for pocket holes?
Yes, having a particular drill bit for pocket holes would be best. The drill bit used for pocket holes is designed to create a pocket or angled hole that allows screws to be driven into the workpiece at an angle.
These bits are often referred to as pocket hole bits or stepped drill bits, and they are specially designed to prevent splitting and to provide a clean, accurate hole.
How do you drill a perfect pocket hole?
You’ll need to use the right tools and techniques to drill a perfect pocket hole. First, clamp the workpiece securely to a workbench or other stable surface.
Then, set the drill bit to the correct depth using a depth or stop collar.
Position the drill bit at the correct angle, typically around 15 degrees, and drill the hole. Be sure to clean out any debris from the spot before driving in the screw.
What drill bit should I use for pocket holes?
The drill bit used for pocket holes is typically stepped. These bits have a cone-shaped tip with multiple diameters, which allows for drilling a pocket hole in two steps.
The larger diameter creates the pocket, while the smaller diameter creates a pilot hole for the screw.
There are various sizes of stepped drill bits available, so be sure to choose the one that is appropriate for the thickness of your workpiece.
It is also essential to use a high-quality bit to ensure a clean, accurate hole.
Do you need to drill pilot holes with pocket holes?
In most cases, you do not need to drill pilot holes when using pocket holes. This is because the pocket hole serves as a pilot hole for the screw that will be driven into the workpiece.
If you are working with a particularly hard or dense wood or using a very long screw, it may be beneficial to drill a pilot hole in addition to the pocket hole. This will help ensure the screw goes smoothly and does not split the wood.
Are pocket holes substantial?
Pocket holes are generally considered strong joints, especially for lighter-weight applications such as furniture and cabinetry.
The angled pocket hole allows for a robust and mechanical joint between the workpieces, and the use of glue can further increase the strength of the joint.
The strength of the joint can be affected by factors such as the quality of the wood, the size of the pocket hole, and the type and length of screw used.


