


When drilling a pilot hole, it might seem straightforward, but its role in ensuring accurate and secure screw placement is crucial.
To drill a pilot hole, begin by marking the spot with a pencil. Next, choose a drill bit slightly smaller than the screw’s size to create a guide hole.
Carefully drill the pilot hole straight and slowly, ensuring accuracy and preventing the wood from splitting.
This fundamental step in drilling ensures secure screw insertion and strengthens the connection between materials.
Whether you’re an experienced DIY enthusiast or just starting in woodworking or construction, understanding the significance of a pilot hole and mastering the technique can significantly impact your projects.
Why Do I Need to Drill a Pilot Hole?
Before we dive into the process, let’s discuss why drilling a pilot hole is essential.
A pilot hole acts as your guide, preventing wood from splitting and ensuring precise screw insertion, especially when dealing with hardwood or delicate materials. It’s the initial step in establishing a durable connection between materials.
How do I choose the right drill bit size to drill a pilot hole?
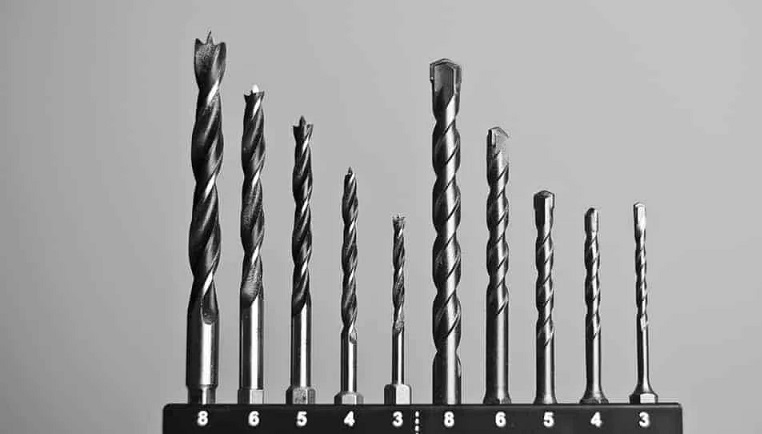
Selecting the correct drill bit size is crucial. The screw’s diameter determines the size. A general rule of thumb is to use a drill bit slightly smaller than the screw’s diameter.
This creates a pilot hole that offers a secure grip while avoiding excessive damage to the material.
How Can I Select the Appropriate Drill Bit for My Pilot Hole?
To find the right drill bit, consider the material you’re working with and the size of the screw. For softwoods, a standard twist drill bit usually suffices, while harder materials like metal may require a specialized bit.
Necessary Tools and Equipment
- Electric Drill: This tool helps to create holes swiftly and efficiently.
- Drill Bits Set: A set of these bits is essential for drilling different sizes of holes.
- Optional Wood Countersinks Set: This set, though optional, aids in creating conical holes, allowing screws to sit flush with the surface of the material.
Steps for Drilling Your Pilot Hole
1. Safety First
Make safety your top priority when using power tools. It’s vital to keep yourself safe and sound!
Wear the right safety gear to protect yourself, like goggles for your eyes and gloves for your hands.
Next, make sure your workpiece is firmly held in place. This helps avoid any unexpected movements that could cause accidents.
And most importantly, stay focused throughout the entire process. Keep your mind on what you’re doing, so you can work safely and accurately.
2. Mark the Pilot Hole Locations
Take your pencil and mark exactly where you want to drill. Make sure your marks are clear and accurate, pinpointing the spot you’ll be working on.
After using the pencil, take a center punch to create a small dent right at the center of your mark.
This dent will serve as a guide for the drill bit, ensuring it starts exactly where you need it to be. This simple yet important step provides a clear starting point for drilling your pilot hole.
3. Use a Guide or a Stop Collar If Necessary
If you want your hole to be the same depth every time, think about using a guide or a stop collar on your drill bit.
This helps you stay consistent and ensures that your holes are all the same depth, making your work look more professional.
A guide or a stop collar acts like a guard, making sure you don’t drill too far into the material. This way, you can have total control over how deep your hole goes.
It’s like having a safety net for your drilling; it keeps everything in check and gives you confidence in your work.
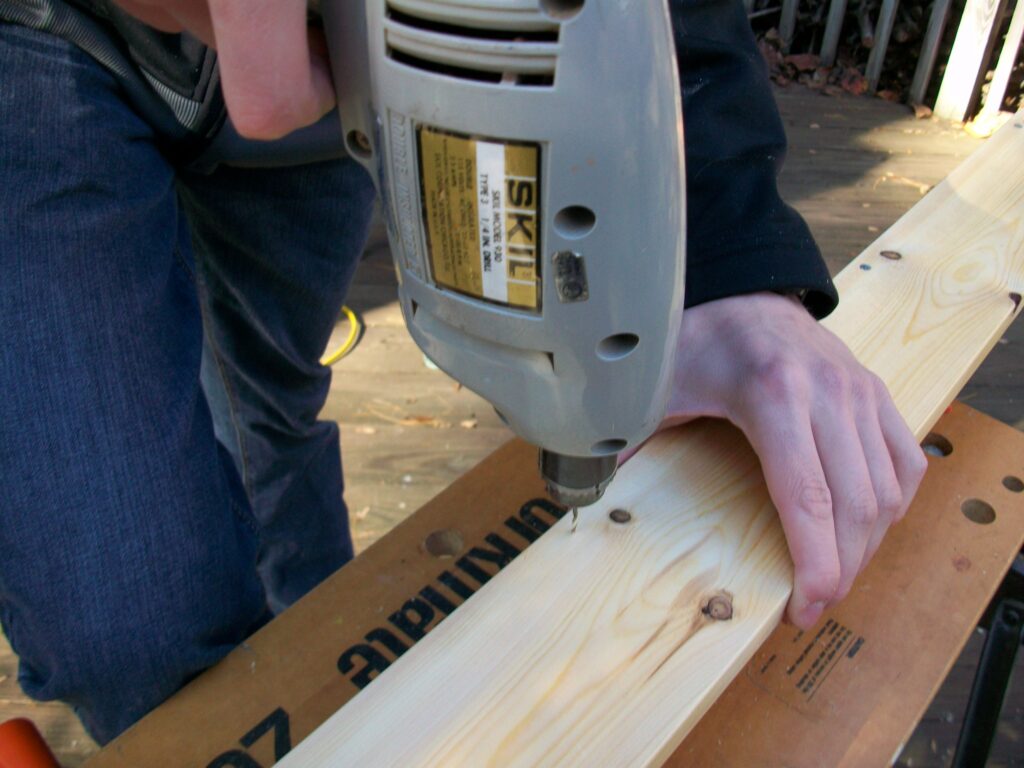
4. Drill the Pilot Hole slowly and Straight
As you begin drilling, take it nice and slow. A gradual and consistent approach is key. Ensure your drill is perpendicular to the material’s surface to maintain alignment throughout the drilling process.
5. Gently Drive in the Screw
Once your pilot hole is prepared, gently guide the screw into place. Let the hole serve as your compass, ensuring smooth and accurate insertion of the screw into the material.
6. Optional: Countersink the Hole
When working with screws that require a flush finish with the material surface, you might want to consider countersinking the hole. This technique allows the screw head to sit seamlessly within the material.
Tips for Drilling a Pilot Hole

1. Invest in Quality Drill Bits
Opt for high-quality drill bits to guarantee precise and durable holes. Better-quality bits often result in cleaner, more accurate holes.
2. Consider Material and Depth
When choosing your drill bit, think about the material you’re working on and how deep the hole needs to be. This consideration ensures the right bit for the job and avoids damage to the material.
3. Keep Your Drill Perpendicular
Maintain a perpendicular angle while drilling to avoid a slanted or misaligned hole. This ensures the screw fits snugly and securely.
Using these tips will enhance your drilling process, making it more accurate and efficient, regardless of your skill level.
In Conclusion
Mastering the skill of drilling a pilot hole is vital for both DIY enthusiasts and professionals. By following these steps and tips, you can guarantee that your projects are secure, precise, and visually appealing.
Keep in mind that this simple step of drilling a pilot hole can significantly enhance the quality and longevity of your work.
FAQs
To drill a pilot hole, can I use a 5/32 bit instead of a 7/32 bit?
While a 5/32 bit can be an alternative, it’s slightly smaller than a 7/32 bit. Using a smaller bit may affect the grip of the screw during the pilot hole drill, potentially leading to less stability in the screw insertion.
Does working with soft materials mean I do not need to drill a pilot hole?
Even in soft materials, it’s recommended to drill a pilot hole, as it helps guide the screw accurately and reduces the chances of the material splitting.
Do I need special drill bits for different materials?
Yes, different materials may require specialized drill bits. For instance, working with metal might necessitate using cobalt or titanium-coated bits, while standard twist bits are often suitable for wood.
How can I drill a pilot hole in drywall, and is it different from other materials?
Drilling a pilot hole in drywall is similar to other materials, but it requires a gentler touch to avoid damaging the delicate surface. Choose the right bit size and create a pilot hole with care.
Also Read
Beginner’s Guide To Use A Cordless Drill


