


Cable railings have gained immense popularity recently for their sleek and modern appearance, making them a stylish and durable alternative to traditional railing systems. Installing cable railings can add a touch of elegance to your deck, balcony, or staircase, creating an unobstructed view and a feeling of open space.
How To Drill Holes For Cable Railing? To drill holes for cable railing, first, mark the precise locations of the holes on the posts or surfaces where the cables will be attached. Use a suitable drill bit for the material (wood, metal, etc.) and drill through the marked points.
One critical aspect of installing cable railings is drilling holes accurately and securely. This blog will guide you through drilling holes for cable railing, ensuring a safe and aesthetically pleasing installation.
Materials Needed
Cable Railing System Kit
Purchase a cable railing kit that includes all the necessary components, such as cables, fittings, and hardware. Ensure the kit is designed for your specific railing project and meets safety standards and regulations.
Also do check: How To Drill Pocket Holes Without A Jig?
Drill
A reliable and suitable drill is essential for drilling holes through the material you’ll be working on. Depending on the complexity of your project, you may opt for a cordless or corded drill.
Drill Bits
Select drill bits that match the size and type of your cables. Typically, stainless steel cables are used for cable railings, so use drill bits designed for drilling through metal.
Tape Measure
Accurate measurements are crucial for a successful cable railing installation. Utilize a tape measure to accurately indicate the specific positions for boring holes on the posts or surfaces where the cables will be affixed.
Pencil Or Marker
Mark the hole locations using a pencil or a marker. This step will assist in upholding precision and uniformity during the drilling procedure.
Level
Ensure your cable railing is straight and level by using a level during the installation. This is important for both safety and aesthetics.
Masking Tape
Applying masking tape on the drill bit’s shaft can serve as a depth guide, preventing you from drilling too deep into the material.
Safety Goggles And Gloves
Protect your eyes and hands with safety goggles and gloves while drilling to prevent any potential injuries.
Power Screwdriver
You may need a power screwdriver to securely attach the cable railing hardware. Ensure you have the appropriate bits for the screws in your railing kit.
Stud Finder (if drilling into walls or posts)
If you install the cable railing on walls or posts, a stud finder can help locate wall studs or secure points for a more robust and secure installation.
Proper Safety Gear
Depending on the material you are drilling into and the environment, consider wearing additional safety gear like ear protection, a dust mask, or knee pads to ensure your safety and comfort during the project.
Plan And Measure
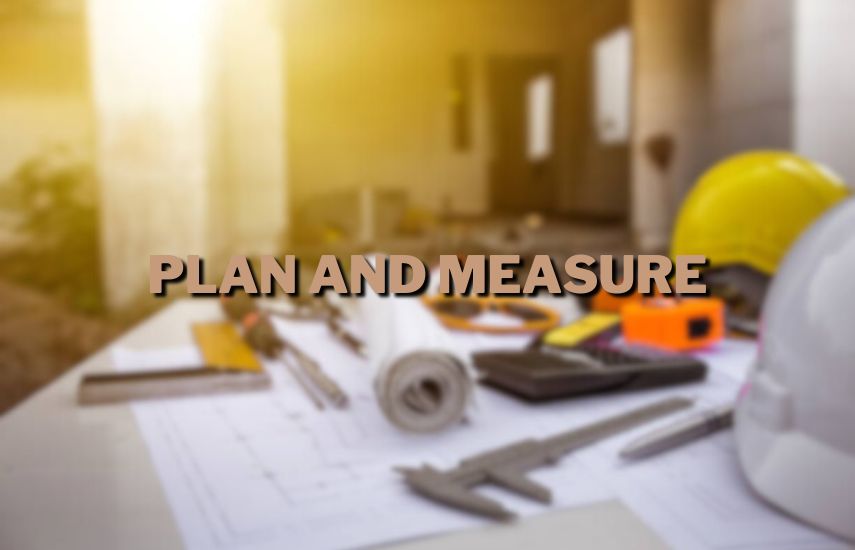
Before starting the drilling process, planning your cable railing layout carefully is essential. Determine where you want the railing posts, ensuring they are spaced appropriately to comply with local building codes. Measure the distances between posts accurately and mark them using a pencil or marker.
Assess Regulations And Building Codes
Before planning your cable railing layout, familiarize yourself with local building codes and regulations. These codes may dictate specific requirements for cable spacing, railing height, and other safety considerations. Adhering to these instructions is essential to guarantee that your cable railing meets aesthetic and safety standards and local regulations.
Choose Railing Post Locations
Determine the locations where you want to install the railing posts. Consider the layout of your deck, balcony, or staircase, and identify areas where railing support is necessary for safety. The positions of the posts will depend on the design of your cable railing system and the intended purpose of the railing.
Spacing And Cable Tension
Calculate the spacing between posts, considering the type and thickness of the cables you plan to use. Cable railing systems generally require smaller spacing between posts than traditional railings, as cables provide less flexibility. The cable tension is also an important consideration – preventing excessive cable movement while allowing for the required structural strength must be appropriate.
Measure The Distances
Once you have determined the railing post locations and the cable spacing, use a tape measure to measure the distances between each post accurately. Double-check your measurements to avoid errors that could affect the stability and overall appearance of the railing.
Mark The Post Locations
With your measurements in hand, employ a pencil or marker to designate the positions where the railing posts will be positioned. Double-check the marks to ensure they are aligned with your plan and level if necessary. Accurate markings are crucial for maintaining consistency and alignment during the drilling process.
Consider Corners And Angles
If your cable railing layout includes corners or angles, plan the positioning of the posts accordingly. Measure and mark the corner post locations, ensuring they are accurately positioned to maintain the straight lines of the cables.
Elevation Changes
Consider the impact on the cable railing layout for staircases or elevated decks with changes in height. Account for the vertical changes when measuring and marking the post locations to ensure the cables run smoothly and safely along the railing.
Review The Plan
Review your plan once you have completed the measurement and marking process. Check for inconsistencies, ensure the railing posts are evenly spaced, and verify that your layout adheres to the building codes and regulations.
Consult With Professionals
If you have any doubts or concerns about the planning and measurement process, consider consulting with a professional contractor or an experienced individual with expertise in cable railing installations. Their insights can provide valuable guidance and ensure a successful and compliant railing system.
By meticulously planning and measuring your cable railing layout, you can create a safe and visually appealing railing installation that enhances the aesthetics and functionality of your deck, balcony, or staircase. Proper planning also ensures that the drilling process goes smoothly, reducing the risk of errors and allowing for a successful cable railing project.
Choose the Right Drill Bit
Select the appropriate drill bit for your cable size. Cable railing kits usually come with specifications on the recommended drill bit size. Use the correct one to achieve a clean and precise hole.
Refer to Cable Railing Kit Specifications
Cable railing kits typically include a set of specifications and instructions for installation. These specifications often include the recommended drill bit size for drilling holes to accommodate the cables. Look for this information in the kit’s instruction manual or packaging.
Consider Cable Material
The type of cable material you are using is an essential factor in selecting the right drill bit. Cable railings commonly use stainless steel cables due to their durability and resistance to corrosion. Stainless steel requires specific drill bits designed to cut through metal effectively. These drill bits usually have a high-speed steel (HSS) or cobalt construction, making them suitable for drilling through stainless steel without overheating.
Cable Diameter
Different cable railing kits come with varying diameters, typically ranging from 1/8 inch to 3/16 inch. The drill bit size must match the cable diameter to create a clean and precise hole. Conversely, using a drill bit that is too large may weaken the structure and reduce the stability of the railing system.
Test On Scrap Material
If you are still determining the appropriate drill bit size for your cable, testing on a piece of scrap material similar to what you’ll be using for your railing is a good idea. This will allow you to confirm that the drill bit creates a hole of the correct size and prevents any unnecessary damage to your railing material.
Safety And Performance
Employing the appropriate drill bit size not only results in a clean and precise hole but also enhances the overall safety and performance of the cable railing system. An accurately sized hole allows for proper tensioning of the cables, ensuring they are securely fastened and can bear the necessary load without any risk of slipping or failing.
Quality Drill Bits
Invest in high-quality drill bits designed for drilling through metal if your cable railing kit includes stainless steel cables. Quality drill bits ensure better performance and last longer, providing value for your investment.
Choosing the right drill bit size for your cable railing project is essential for a successful and secure installation. By following the specifications in your cable railing kit and considering the cable material and diameter, you can ensure that the drill holes are appropriately sized, resulting in a durable, safe, and aesthetically pleasing cable railing system.
Mark Hole Locations

Using the measurements from your plan, mark the hole locations on the posts or walls where the cables will pass through. Double-check the accuracy of your measurements and marks before proceeding.
Verify Measurements
Before marking the hole locations:
- Cross-check your measurements with your initial plan to ensure accuracy.
- Double-check the spacing between the posts and the cable tension specifications.
- Confirm that the distances between each post align with your design and comply with local building codes.
Prepare the Posts or Walls
If installing the cable railing on wooden posts, ensure they are clean, dry, and free of any obstructions. Avoid smudging the finish while marking if the posts are already treated or stained. If drilling into walls, ensure they are structurally sound and appropriate for supporting the cable railing system.
Use A Tape Measure
Utilize a tape measure to measure and precisely mark the locations where the holes are to be drilled. Start from the bottom of the post and measure the distance up to the desired height of the first cable hole. Ensure the tape measure is straight and level to maintain accuracy. Repeat this process for each post.
Mark with a Pencil or Marker
Once you have measured and identified the precise locations for the holes, use a pencil or marker to make clear and visible marks on the posts or walls. Lightly mark the locations initially to make any adjustments before finalizing the positions. Use a level to ensure the marks are perfectly straight and aligned.
Consistent Hole Height
If drilling multiple holes on a single post, use a level to ensure all the marks are at the same height. This is especially important when installing a cable railing on staircases, where the holes need to be uniformly aligned across multiple posts for a visually appealing and consistent look.
Plan For Cable Angles
If your cable railing layout includes angles or turns, consider how the cables will run along the posts. Mark the hole locations so the cables follow a smooth path and create a visually pleasing appearance.
Safety Precautions
While marking the hole locations, you must equip safety glasses and gloves to protect yourself from potential debris or splinters. Consider using masking tape to indicate the drilling depth on the drill bit to avoid over-drilling and damaging the posts or walls.
Step Back And Review
After marking all the hole locations, step back and review the positions. Check for consistency, alignment, and spacing between the marks. Ensure that the holes are appropriately positioned for cable tension and stability.
Seek Assistance If Needed
If you need clarification on the hole locations or have a complex cable railing layout, it’s a good idea to seek assistance from a professional contractor or an experienced individual.
Secure the Posts
If you install your cable railing on a deck or staircase, ensure the posts are adequately secured to the surface. Use brackets or anchor bolts to fix the posts firmly in place. This step is crucial as the stability of the entire railing system depends on it.
Choose Suitable Post Materials
Before installing cable railing, ensure that the posts you use are appropriate for supporting the tension and load of the cables. Common materials for posts include wood, metal, and composite materials. The posts should be strong, durable, and able to withstand outdoor elements if your railing is outside.
Check Building Codes
Consult local building codes and regulations to ascertain the stipulated specifications for post spacing, railing height, and the prescribed methods for securing. Complying with these codes is essential to ensure the safety and structural integrity of the cable railing system.
Pre-Drill And Attach Brackets
If you are installing cable railing on a wooden surface, pre-drill holes for the brackets on the underside of the deck or staircase. Use appropriate screws or bolts to secure the brackets firmly to the posts. The brackets will serve as the anchor points for the cable fittings and help distribute the tension evenly along the railing.
Metal Posts And Anchoring
For metal posts or other types of surfaces, use anchor bolts or suitable hardware to secure the posts firmly to the ground or structure. Make sure to select anchors designed for the specific material and load requirements.
Level The Posts
Before entirely securing the posts, use a level to ensure they are upright and aligned correctly. Adjust the posts as needed to achieve a straight and even alignment. Level posts are crucial for maintaining the integrity and appearance of the cable railing system.
Apply Proper Spacing
Ensure that the posts are spaced according to your cable railing layout plan. The spacing between the posts should comply with building codes and suit the cable diameter. Proper spacing is necessary for even tension distribution and a visually pleasing railing appearance.
Use Support Bracing (if needed)
If installing the cable railing on a long stretch or elevated area, consider using support bracing to reinforce the posts. Bracing can add extra stability and prevent excessive movement or deflection of the railing.
Test The Stability
Before proceeding with the cable installation, give the posts a firm shake to ensure they are anchored and stable. Make any necessary adjustments to the post-securing method to ensure they can withstand the tension of the cables.
Seek Professional Assistance
If you need more clarification about properly securing the posts or dealing with a complex installation scenario, consult a professional contractor or an experienced individual. They can offer valuable insights and ensure your posts are securely fixed for a safe, long-lasting cable railing system.
Regular Inspection And Maintenance
Once the cable railing is installed, inspect the posts and brackets periodically for any signs of wear or loosening. Regular maintenance will help ensure the continued stability and safety of the cable railing system over time.
By carefully securing the posts for your cable railing system, you lay the foundation for a stable and reliable installation. Properly anchored posts provide the necessary support for the tension in the cables and help maintain the overall integrity and appearance of the cable railing. Taking the time to ensure a solid post installation will contribute to the longevity and safety of your cable railing system.
Drill the Holes

Before drilling, ensure you are adequately equipped with safety gear, including goggles and gloves. Apply masking tape over the drilling area to prevent wood splintering. It’s advisable to practice drilling on a scrap piece of wood beforehand to become familiar with the process.
Position the drill perpendicular to the surface and maintain steady pressure as you drill the holes. Patience is vital; avoid rushing the process, as precise holes are crucial for the cables to fit correctly. Continue drilling until you reach the desired depth, which should be sufficient to properly secure the cable fittings.
Safety Precautions
Before drilling, prioritize safety by putting on your safety gear, including safety goggles and gloves. These protect your eyes and hands from flying debris or sharp edges during drilling.
Masking Tape For Splintering
To prevent wood splintering or damage to the surface, apply masking tape over the area you intend to drill. The tape helps create a cleaner hole and protects the surface finish of the posts, especially if they are made of wood.
Practice On Scrap Material
If you are new to drilling or working with specific materials, practicing on a scrap piece of wood or metal is a good idea. This practice will help you understand the drilling process, the correct pressure, and how the drill interacts with the material.
Positioning The Drill
Position the drill perpendicular to the surface of the post. Using a level or visual alignment, ensure that the drill is straight and not angled, as this will affect the hole’s accuracy and may lead to difficulty inserting the cable.
Steady And Patient Drilling
When drilling, apply steady and consistent pressure to avoid wobbling or skewing the hole. Avoid rushing the process, as precise holes are crucial for the cables to fit correctly and for the overall stability of the railing system.
Depth of the Holes
The depth of the holes is essential to accommodate the cable fittings adequately. Drill the holes to the appropriate depth based on the length of the fittings and the cable tensioning requirements. It’s a good idea to use a depth gauge or the masking tape guide on the drill bit to achieve the desired depth consistently.
Clearing Debris
During drilling, periodically retract the drill to clear debris from the hole. This prevents clogging and ensures a clean and smooth hole.
Check Hole Diameter
After drilling each hole, verify that the diameter suits the cable fittings. Ensure the cables can pass through the holes without obstructions or difficulties.
Clean The Area
After drilling all the holes, remove the masking tape and clean the area around the holes to eliminate any debris. A clean surface will facilitate the installation of the cable fittings.
Double-Check Hole Alignment
Before proceeding with cable installation, double-check the drilled holes’ alignment. Ensure they are straight, evenly spaced, and aligned to your cable railing plan.
Fitting Installation
Once the holes are drilled, and the area is clean, follow the cable railing system kit’s instructions to install the cable fittings securely. Properly installed fittings are vital for maintaining tension and stability in the cable railing.
Drilling the holes with precision and care ensures that the cable railing system will be installed appropriately, visually appealing, and withstand the required tension and load. Patient and accurate drilling is the key to a successful cable railing installation that will serve you well for years.
Deburr and Clean the Holes
After drilling each hole, remove the masking tape and use a deburring tool or a metal file to smooth out any rough edges or burrs around the hole. This step ensures the cables can pass through the holes smoothly and without obstructions.
Remove Masking Tape
Once you have completed drilling all the holes for your cable railing, carefully remove the masking tape from each hole, not damaging the surrounding surface.
Deburring Tool Or Metal File
To ensure the cables can pass through the holes smoothly and without obstructions, use a deburring tool or a metal file to remove these burrs and create a clean and smooth hole.
Deburring Tool
A deburring tool removes burrs and sharp edges from holes, pipe ends, or metal surfaces. It usually consists of a handle with a cutting blade or a rotating bit that you can insert into the hole and rotate gently to shave off any protruding metal edges. This tool is efficient and precise in removing burrs.
Metal File
A metal file can also deburr the holes if you don’t have a deburring tool. A metal file is a handheld tool with a rough surface that allows you to file away burrs and smooth the edges around the hole. Use the file circularly around the hole until the rough edges are eliminated, ensuring a clean cable passage.
Deburring Importance
Removing burrs is essential for several reasons:
- It prevents the cables from getting caught or damaged while threading them through the holes.
- It ensures the cables move freely, facilitating proper tensioning and adjustments during the railing installation.
- Deburring prevents sharp edges that could cause injury during the cable installation or future maintenance.
Clean The Holes
After deburring, clean the holes to remove any debris or metal shavings that might be left behind. Use a brush or compressed air to remove particles from the holes. A clean hole will make it easier to thread the cables and provide a neat appearance to your cable railing system.
Final Inspection
Once all the holes are deburred and cleaned, conduct a final inspection to ensure they are smooth, even, and ready for cable installation. Double-check that the cables can pass through the holes without resistance or snags.
By taking the time to deburr and clean the holes, you ensure the cables’ smooth and secure passage through the drilled holes. This attention to detail contributes to a well-finished cable railing system that looks professional and functions safely and efficiently. A thorough deburring process will make cable installation and future maintenance hassle-free and provide your cable railing project with a polished finish.
Install Cable Fittings

Thread the cable fittings through the drilled holes, following the instructions provided in your cable railing kit. Typically, this involves attaching a washer and nut to the cable end on one side of the post and a tensioning fitting on the other.
Gather Cable Fittings
Before beginning the installation, ensure you have all the cable fittings in your cable railing kit. These fittings may include washers, nuts, tensioning fittings, and other hardware required for securing the cables to the posts.
Prepare The Cables
If your cable railing kit includes spooled or wound-together cables, carefully unwind and straighten them. This will make it easier to thread the cables through the drilled holes.
Begin Threading The Cables
Starting with one end of the cable, thread it through the first drilled hole on the post, following the path you planned during the layout stage. Depending on your cable railing system design, you may need to thread the cables vertically or horizontally through the posts.
Attach The First Cable Fitting
Once the cable is through the hole, secure the first cable fitting to the exposed end. The cable fitting will typically include a washer and a nut. Place the washer against the post surface, ensuring it sits flush against the wood or metal. Then, thread the nut onto the cable end and hand-tighten it against the washer. The washer and nut on this side of the post will prevent the cable from pulling through.
Thread Through The Next Hole
Continue threading the cable through the drilled holes, ensuring it follows the planned path and maintains proper tension. As you thread the cable, ensure it runs smoothly without any kinks or twists.
Install Tensioning Fitting
Once the cable reaches the other side of the post, you’ll attach the tensioning fitting. The tensioning fitting is designed to keep the cable taut and maintain the desired tension in the railing system. Follow the instructions in your cable railing kit to properly install the tensioning fitting.
Tensioning The Cable
After installing the tensioning fitting, use the appropriate tools, such as a tensioning wrench or a cable tension gauge (if included in the kit), to adjust and tighten the cable to the desired tension. Proper tensioning is crucial for the structural integrity and safety of the cable railing.
Repeat The Process
Repeat the threading, fitting, and tensioning process for each cable on the railing system. Ensure each cable is installed with the same care and attention to detail to maintain a consistent and level appearance.
Check Alignment And Tension
As you progress with the cable installation, periodically check the alignment and tension of the cables to ensure they are straight, evenly spaced, and securely fastened. Make any necessary adjustments to maintain a uniform and visually appealing cable railing.
Trim Excess Cable
Once all the cables are installed and tensioned, trim any excess cable length beyond the fittings. Use appropriate cable cutters or other cutting tools to make clean and precise cuts.
Final Inspection
After completing the cable fitting installation, conduct a final inspection of the entire railing system. Check that all the fittings are secure, the cables are evenly tensioned, and the overall appearance meets your design expectations.
By carefully installing the cable fittings according to the cable railing kit instructions, you ensure a safe, secure, and aesthetically pleasing cable railing system. Attention to detail during the fitting installation process will contribute to the longevity and performance of your cable railing, providing you with a stylish and functional addition to your deck, balcony, or staircase.
Tension the Cables
Once all the cables are threaded through the holes, and the fittings are in place, use a power screwdriver to tension the cables. This step is crucial to ensure the cables are securely in place and the railing is stable.
Gather Tools
Before tensioning the cables, ensure you have all the necessary tools ready. These typically include a power screwdriver or a wrench, a cable tension gauge (if included in the cable railing kit), and any other specific tools the manufacturer recommends.
Identify Tensioning Fittings
Locate the tensioning fittings on the opposite side of the posts from where the cable fittings are secured. The tensioning fittings are designed to tighten the cables and maintain the desired tension in the railing system.
Adjust Tensioning Fittings
Depending on the tensioning fittings used in your cable railing kit, you may need to turn an adjusting nut or screw to tension the cables. Refer to the instructions in the kit to understand how to adjust the tensioning fittings properly.
Tensioning Process
Begin tensioning the cables one at a time, starting from one end of the railing system and working your way to the other end. Attach the power screwdriver or wrench to the adjusting nut or screw of the tensioning fitting.
Apply Tension Gradually
Using the power screwdriver or wrench, gradually turn the adjusting nut or screw to apply tension to the cable. Apply the tension in small increments, avoiding over-tightening the cable.
Use a Cable Tension Gauge (if available)
If your cable railing kit includes a cable tension gauge, use it to ensure you achieve the desired tension level uniformly across all the cables. The cable tension gauge accurately measures the tension, helping you maintain consistency throughout the railing system.
Check Tension Alignment
As you tension each cable, periodically check the alignment and spacing of the cables to ensure they remain straight and evenly spaced. Proper tensioning ensures the cables are securely in place, and the railing maintains a level and visually appealing appearance.
Check Cable Alignment With Level
Use a level to confirm that the cables are straight and correctly aligned. A level ensures that the cables are not skewed or uneven, further enhancing the aesthetics and safety of the cable railing.
Achieve Even Tension
Aim to achieve even tension across all the cables to create a balanced and stable railing system. Consistent tension ensures that each cable contributes equally to the railing’s strength.
Final Inspection
After tensioning all the cables, conduct a final inspection of the entire cable railing system. Check that all the fittings and tensioning adjustments are secure and that the cables are appropriately tensioned.
Test For Stability
Once the tensioning process is complete, test the stability of the cable railing by applying gentle pressure. A properly tensioned and installed cable railing should be stable and free from excessive movement or flexing.
Following these steps and carefully tensioning the cables ensures your cable railing system is secure, stable, and visually appealing. Proper tensioning is crucial for the structural integrity and safety of the railing, providing you with a long-lasting and reliable cable railing installation. Regularly inspect the tension and fittings over time and make necessary adjustments to maintain the railing’s performance and aesthetics.
Check for Level and Alignment

Using a level, check that the railing posts and cables are perfectly aligned and level. Make adjustments to achieve a straight and visually appealing cable railing system.
Gather Necessary Tools
Before beginning the level and alignment check, ensure you have a reliable level appropriate for the length of your cable railing. A long, straight level will allow you to assess the alignment over a broader area.
Start At One End
Begin the level and alignment check at one end of the cable railing. Place the level vertically against the side of the post and check if it is plumb (perfectly vertical). Adjust the post as needed to achieve plumpness.
Check Horizontal Level
After confirming the vertical alignment, lay the level horizontally across the top of the post or handrail to check for levelness. The bubble in the level should be centered if the railing is level. Adjust the post or handrail to achieve a horizontal position if it is not level.
Move Along The Railing
Continue moving along the railing, checking each post for vertical plumpness and horizontal levelness. Please pay close attention to any corners or angles where posts meet to ensure they are aligned correctly.
Check Cable Alignment
As you progress with the level check, also examine the alignment of the cables. The cables should run parallel and evenly spaced along the railing length. Adjust the tensioning fittings as needed to maintain consistent spacing and alignment.
Verify Tensioning
Double-check the tension in each cable by lightly tapping them with your hand. A correctly tensioned cable will not have any significant give or movement if you notice any loose cables, re-adjust the tensioning fittings accordingly.
Trim Excess Cable
Trim the excess cable using appropriate cable cutters if any cables extend beyond the fittings. Trimmed cables should not protrude excessively from the fittings.
Check for Twist or Buckle
Be on the lookout for any twisted or buckled cables. Address any issues promptly to maintain a uniform appearance.
Fine-Tuning Adjustments
Making fine-tuning adjustments may be necessary to achieve perfect level and alignment. Carefully adjust the posts and cable tensioning as needed to correct any discrepancies.
Recheck from A Distance
View the entire cable railing system from a distance to assess its alignment and level. Viewing from different angles can also reveal any imperfections that may need correction.
Final Inspection
After making all adjustments, conduct a final inspection of the cable railing system. Ensure the posts are vertical, the handrail or top rail is level, and the cables are evenly aligned and adequately tensioned.
By thoroughly checking for level and alignment, you ensure your cable railing system functions safely and presents a visually pleasing appearance. A level and adequately aligned cable railing enhances the overall aesthetics of your deck, balcony, or staircase and reflects the care and attention to detail put into the installation process.
Conclusion (How To Drill Holes For Cable Railing)
To drill holes for cable railing, first, mark the precise locations of the holes on the posts or surfaces where the cables will be attached. Use a suitable drill bit for the material (wood, metal, etc.) and drill through the marked points. Ensure the holes are straight and of the correct diameter to securely accommodate the cables, allowing for a sturdy and aesthetically pleasing cable railing installation.
Cable railing systems offer a modern and elegant solution for enhancing the aesthetics and value of your property. Installing cable railings requires careful planning, measurement, and drilling to ensure a safe and secure railing system. By following the step-by-step guide provided and wearing the necessary safety gear, you can confidently tackle the drilling process for your cable railing project.
Remember to carefully plan the layout, choose the right drill bit size, and mark the hole locations accurately. Taking the time to deburr and clean the holes will create smooth passageways for the cables, ensuring a seamless and visually appealing installation.


