


Drill bits are essential tools for any DIY enthusiast or professional. Over time, drill bits tend to dull due to regular use, reducing their effectiveness and slowing down drilling speeds. Sharpening a drill bit can restore its cutting edge and improve its performance, saving you time and money in the long run.
How To Sharpen A Drill Bit 3,600? To sharpen a drill bit with a 3,600 grind, use a bench grinder or drill bit sharpener to maintain a 59-degree angle on the cutting edge while applying consistent pressure and cooling the bit periodically.
In this blog, we will explore a step-by-step process to sharpen a drill bit using a 3,600 grit sharpening stone. Let’s get started!
Materials Needed
Dull drill bit(s)
These are the drill bits that have become blunt or dull due to use. It’s important to identify the drill bits that require sharpening before proceeding with the process.
Safety goggles
Safety goggles are an essential part of any sharpening process. They protect your eyes from any flying debris or sparks that may occur during sharpening. Make sure to wear them throughout the entire process to prevent any potential eye injuries.
Sharpening stone (3,600 grit)
A sharpening stone with a 3,600 grit is recommended for drill bit sharpening. This grit size provides a fine surface that can effectively restore the cutting edges of the drill bit. The stone should be designed specifically for drill bit sharpening to ensure proper angle and shape.
Lubricant or honing oil
A lubricant or honing oil is used during the sharpening process to reduce friction and heat. This helps prevent the drill bit from overheating and extends the life of the stone. Apply a small amount of lubricant or honing oil to the sharpening stone before beginning the sharpening process.
A bench vise or clamp
To securely hold the drill bit in place during sharpening, a bench vise or clamp is necessary. This ensures stability and safety while working on the bit. The vise or clamp should be strong enough to firmly hold the drill bit without allowing any movement or slippage.
Cleaning cloth
After sharpening the drill bit, a cleaning cloth or rag is useful for wiping off excess oil or debris. This ensures that the drill bit is clean and ready for use. Wipe the bit gently to remove any residual oil or particles that may have accumulated during sharpening.
By having these materials ready, you can ensure a smooth and efficient drill bit sharpening process while maintaining safety and achieving optimal results.
Safety First

Before you begin sharpening your drill bit, prioritize your safety. Put on a pair of safety goggles to protect your eyes from any potential metal shavings or debris that may be generated during the sharpening process.
Safety goggles
Always wear a pair of safety goggles before you begin sharpening your drill bit. The process of sharpening can produce metal shavings, sparks, or debris that can easily get into your eyes. Safety goggles provide a protective barrier, shielding your eyes from potential harm. Ensure that the goggles fit properly and offer adequate coverage.
Secure work area
Set up your work area in a clean, well-lit, and well-ventilated space. Remove any clutter or obstructions that could cause accidents or distractions. Ensure that there are no flammable materials nearby, as sparks may be generated during the sharpening process.
Sturdy work surface
Place your sharpening stone on a stable and secure work surface. This prevents any movement or instability during the sharpening process. A stable work surface minimizes the risk of accidents or injuries caused by slipping or falling objects.
Proper grip
When handling the drill bit during sharpening, maintain a firm and secure grip. Avoid holding the drill bit loosely or with slippery gloves, as this can lead to accidents or the bit slipping out of your hand.
Proper body positioning
Position yourself in a way that allows you to have full control over the sharpening process. Stand or sit in a comfortable and balanced posture, with a stable footing. Avoid leaning or overreaching, as this can cause imbalance or strain.
Use appropriate force
Apply moderate and controlled pressure while sharpening the drill bit. Excessive force can lead to the bit slipping or the stone becoming unstable, increasing the risk of accidents. Let the sharpening stone do the work and maintain a steady hand.
Take breaks
If the sharpening process is time-consuming or requires repetitive movements, take periodic breaks to rest and avoid fatigue. Fatigue can decrease your focus and increase the risk of accidents. Use these breaks to stretch and refocus your attention before continuing.
By prioritizing safety and following these guidelines, you can minimize the risk of accidents and injuries during the drill bit sharpening process. Always exercise caution and remain alert throughout the entire process.
Preparing the Work Area
Set up a suitable work area with ample lighting. Place a clean cloth on the work surface to catch any metal shavings and provide a clean and stable area for your sharpening process.
Adequate lighting
Ensure that your work area is well-lit to provide clear visibility during the sharpening process. Sufficient lighting allows you to see the drill bit and sharpening stone clearly, reducing the risk of errors or accidents.
Clean work surface
Start by cleaning your work surface to remove any dust, dirt, or debris. This helps maintain a clean environment and prevents unwanted particles from interfering with the sharpening process. A clean surface also provides stability for the sharpening stone and the drill bit.
Protective cloth
Place a clean cloth or a dedicated metal-shavings-catching cloth on the work surface. This cloth will help catch the metal shavings and debris generated during the sharpening process. It not only keeps your work area clean but also prevents the shavings from scattering and potentially causing injury.
Stability and organization
Ensure that all the necessary tools and materials are organized and within reach. This includes the sharpening stone, lubricant or honing oil, safety goggles, and any other items needed. Having everything organized minimizes the risk of accidents caused by searching for tools or reaching over cluttered areas.
Clear work area
Remove any unnecessary objects or obstructions from your work area. Clutter or obstacles can impede your movements and increase the risk of accidents. Keep the area clear and free from items that may interfere with your sharpening process.
Ventilation
If possible, set up your work area in a well-ventilated space. Proper ventilation helps dissipate any fumes or odors that may be produced during the sharpening process. If ventilation is not available, ensure that there is sufficient fresh air circulation in the room.
By taking the time to prepare your work area properly, you create an organized, clean, and safe environment for sharpening your drill bit. This enables you to focus on the task at hand and reduces the risk of accidents or interruptions during the process.
Securing the Drill Bit
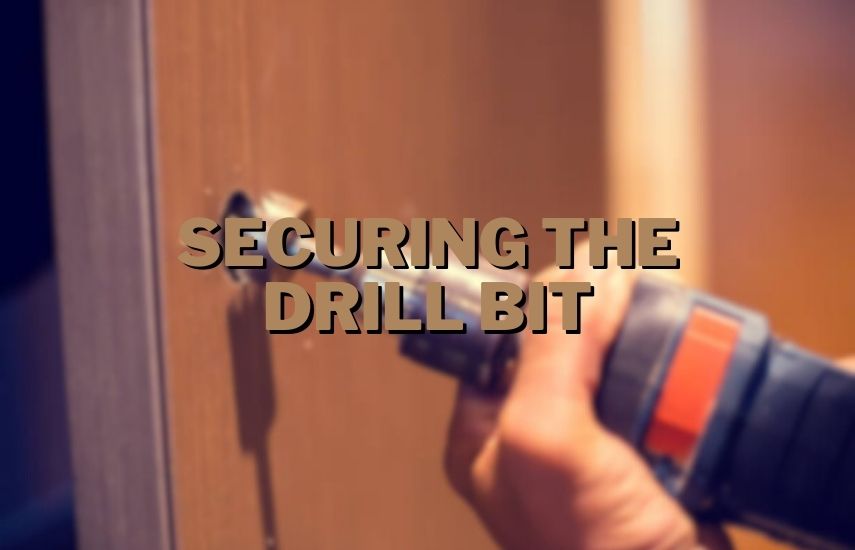
To effectively sharpen a drill bit, it needs to be secured firmly. Attach a bench vise or clamp to your work surface, ensuring that the drill bit is held securely. Make sure the drill bit is positioned at a comfortable height and angle for sharpening.
Choose a suitable vise or clamp
Select a bench vise or clamp that is appropriate for the size and type of drill bit you are sharpening. Ensure that it has sufficient grip strength and stability to securely hold the drill bit in place throughout the sharpening process.
Positioning the vise or clamp
Attach the vise or clamp to your work surface, ensuring it is securely fastened. Make sure it is positioned in a way that allows easy access and maneuverability for sharpening the drill bit.
Align the drill bit
Insert the drill bit into the vise or clamp jaws, ensuring that it is held firmly but not overly tightened. The jaws should provide enough grip to prevent any movement or slippage during the sharpening process.
Comfortable height and angle
Adjust the vise or clamp to position the drill bit at a comfortable height and angle for sharpening. The height should allow you to maintain a natural posture and have a clear view of the cutting edges. The angle should match the desired point angle of the drill bit, typically around 59 degrees for most bits.
Stability and balance
Verify that the vise or clamp is securely holding the drill bit and that it is well-balanced. A stable and balanced setup reduces the risk of accidents caused by the drill bit shifting or becoming unstable during sharpening.
Accessibility
Ensure that you have easy access to the cutting edges of the drill bit while it is secured in the vise or clamp. This allows you to work comfortably and apply the necessary sharpening techniques evenly across the entire cutting edge.
Double-check the grip
Before starting the sharpening process, double-check the grip of the vise or clamp on the drill bit. Give the bit a gentle tug to confirm that it is securely held in place. This step is crucial to prevent accidents caused by a loose or unstable grip.
By securing the drill bit in a vise or clamp and positioning it at the appropriate height and angle, you create a stable and accessible setup for sharpening. This ensures that you can work safely and effectively on restoring the cutting edges of the drill bit.
Assessing the Drill Bit
Before you begin sharpening, inspect the drill bit for any damage or significant wear. If the bit is severely damaged or worn, it may be better to replace it. Iif the bit only shows signs of dullness, it can be effectively sharpened.
Visual inspection
Carefully examine the drill bit for any visible signs of damage or excessive wear. Look for chips, cracks, or broken edges. If the bit is significantly damaged, such as a broken or heavily chipped tip, it may be better to replace it rather than attempting to sharpen it.
Check for wear
Assess the overall wear of the drill bit. Over time, drill bits can become dull due to regular use. Look for signs of bluntness, such as rounded cutting edges or a decrease in cutting performance. If the bit is only showing signs of dullness without major damage, it can likely be effectively sharpened.
Gauge the usability
Consider the intended use of the drill bit. If it is a specialized or expensive bit, it may be worth the effort to sharpen it, even if the wear is moderate. On the other hand, if the bit is a common or inexpensive one, it might be more cost-effective to replace it rather than investing time in sharpening.
Assess the material
Take into account the material of the drill bit. Some materials, like carbide-tipped bits, are more difficult to sharpen effectively and may require professional sharpening services. High-speed steel (HSS) bits, on the other hand, are more suitable for sharpening at home.
Consider the size and complexity
Larger or more complex drill bits, such as those with multiple cutting edges or specialized designs, may require advanced sharpening techniques or professional assistance. Evaluate your sharpening skills and the complexity of the bit before deciding to proceed with sharpening.
Remember, sharpening can only restore the original performance of a drill bit to a certain extent. If the bit is severely worn, damaged beyond repair, or of poor quality, it may be best to replace it with a new one. Prioritize safety and make an informed decision based on the condition, material, and complexity of the drill bit before proceeding with the sharpening process.
Selecting the Sharpening Stone
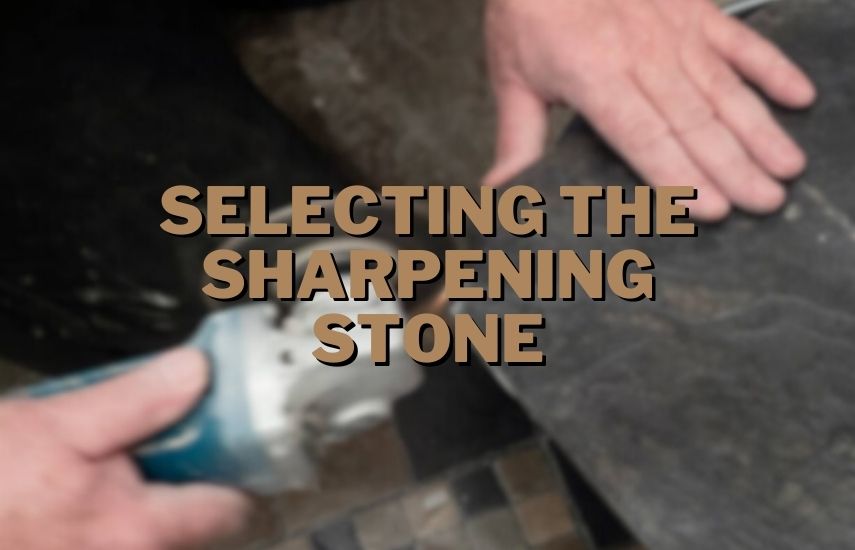
Choosing the right sharpening stone is crucial for achieving a sharp and precise edge. For drill bits, a 3,600 grit sharpening stone is recommended. This fine-grit stone provides a smooth and polished surface, ideal for restoring the cutting edge of a drill bit.
Grit size
The grit size of a sharpening stone determines its coarseness or fineness. For drill bit sharpening, a stone with a grit size of 3,600 is recommended. This fine-grit stone provides a smooth and polished surface, which is ideal for restoring the cutting edge of a drill bit.
Material
Sharpening stones are typically made from various materials, including natural stones like oil stones or water stones, as well as synthetic materials like diamond stones or ceramic stones. Each material has its advantages and characteristics. Synthetic stones are more commonly used for drill bit sharpening due to their durability and consistent grit size.
Size and shape
Sharpening stones come in various sizes and shapes, such as rectangular blocks or bench stones. The size and shape you choose depend on personal preference and the size of the drill bits you intend to sharpen. Ensure that the stone is large enough to accommodate the length and width of the drill bit comfortably.
Lubrication
Consider whether the sharpening stone requires lubrication. Some stones need to be used with water or honing oil, while others can be used dry. Check the manufacturer’s instructions or recommendations for the specific sharpening stone you are using. Using the appropriate lubricant can enhance the sharpening process and extend the life of the stone.
Personal experience and preference
Experience and personal preference can play a role in stone selection. As you gain more experience with sharpening drill bits, you may develop a preference for a particular type or brand of sharpening stone. Experimenting with different stones can help you determine which one works best for you.
When selecting a sharpening stone for drill bit sharpening, prioritize a 3,600 grit stone as it offers the right level of fineness for achieving sharp and precise cutting edges. Consider the material, size, shape, and lubrication requirements of the stone to ensure it meets your needs and preferences. By choosing the right sharpening stone, you set yourself up for effective and efficient drill bit sharpening.
Applying Lubricant
Using a lubricant or honing oil on the sharpening stone is essential to ensure smooth and efficient sharpening. Apply a few drops of lubricant to the surface of the stone, spreading it evenly with your finger or a cloth.
Selecting the lubricant
Choose a suitable lubricant or honing oil specifically designed for use with sharpening stones. These lubricants help reduce friction, prevent overheating, and enhance the sharpening process. Some common options include mineral oil, honing oil, or specialized sharpening oil. Refer to the manufacturer’s instructions or recommendations for the specific lubricant to use.
Preparing the stone
Before applying the lubricant, ensure that the sharpening stone is clean and free from any debris or residue. Wipe the stone with a clean cloth to remove any dust or particles that may affect the sharpening process.
Applying the lubricant
Start by placing a few drops of lubricant or honing oil on the surface of the sharpening stone. The amount may vary depending on the size of the stone and the length of the sharpening session. It’s generally better to start with a small amount and add more if necessary.
Spreading the lubricant
Use your finger or a clean cloth to spread the lubricant evenly across the surface of the sharpening stone. Ensure that the lubricant covers the entire area where you’ll be sharpening the drill bit. The lubricant creates a thin film that helps reduce friction and heat buildup during the sharpening process.
Reapply as needed
During the sharpening process, periodically check the lubrication level on the stone. If the lubricant dries out or gets absorbed, apply a few more drops and spread it evenly again. Maintaining adequate lubrication ensures a smooth and efficient sharpening process.
Proper lubricant disposal
After you finish sharpening, properly dispose of any used lubricant according to local regulations. Some lubricants may be considered hazardous waste and require specific disposal methods. Check with your local waste management guidelines to ensure proper disposal.
Applying lubricant or honing oil to the sharpening stone helps reduce friction and heat, allowing the drill bit to glide smoothly during sharpening. It also helps prevent clogging of the stone with metal shavings, ensuring consistent performance throughout the process. By following these steps, you’ll ensure a well-lubricated sharpening surface for optimal results.
Sharpening Technique
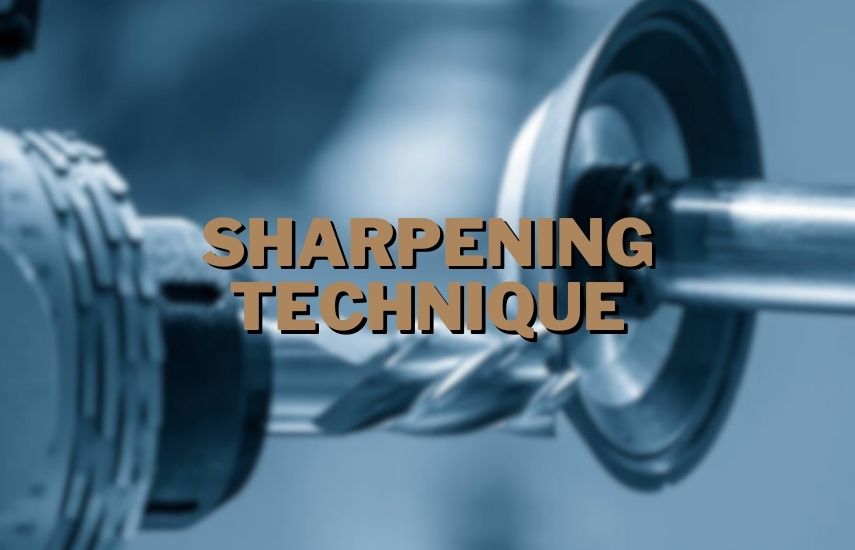
Hold the drill bit by the shank and align it with the sharpening stone at a 59-degree angle, which is the standard angle for most twist drill bits. Make sure the cutting edge of the bit touches the stone. Using light pressure, move the drill bit across the stone in a smooth, circular motion. Start from the outer edge and work your way toward the center. Repeat this process for each flute of the drill bit, maintaining a consistent angle.
Grip and positioning
Hold the drill bit by its shank, ensuring a firm and comfortable grip. Align the bit with the sharpening stone, setting it at a 59-degree angle. This angle is the standard for most twist drill bits and provides an optimal cutting edge. Make sure the cutting edge of the bit contacts the stone.
Light pressure
Apply light pressure while sharpening the drill bit. Pressing too hard can lead to uneven sharpening or excessive removal of material, affecting the overall performance of the bit. Maintaining a gentle and consistent pressure allows for more control and precision during the sharpening process.
Circular motion
Move the drill bit across the sharpening stone in a smooth, circular motion. Begin at the outer edge of the stone and gradually work your way toward the center. This technique ensures even sharpening and helps maintain a consistent angle throughout the process.
Flute-by-flute sharpening
Sharpen each flute of the drill bit individually. While sharpening, focus on one flute at a time and make several passes to ensure an even and uniform edge. This approach helps maintain symmetry and balance in the cutting edges of the drill bit.
Consistent angle
Pay close attention to maintaining a consistent angle throughout the sharpening process. Deviating from the desired angle can result in uneven sharpening and negatively impact the performance of the drill bit. Regularly check the alignment and angle of the bit with the sharpening stone to ensure accuracy.
Cooling breaks
Take periodic breaks during the sharpening process to allow the drill bit and sharpening stone to cool down. Overheating can affect the hardness and temper of the bit, potentially reducing its effectiveness. If the drill bit or stone becomes excessively hot, it is advisable to pause and allow them to cool before continuing.
Visual inspection
As you sharpen the drill bit, periodically stop and visually inspect the cutting edges. Look for any signs of improvement, such as a restored sharpness and defined cutting edges. This inspection allows you to assess your progress and make any necessary adjustments in your sharpening technique.
Remember to sharpen each flute of the drill bit evenly and maintain a consistent angle throughout the process. By following these steps and practicing the proper sharpening technique, you can restore the cutting edges of your drill bit effectively and improve its performance.
Checking Progress
After a few passes, lift the drill bit from the stone and wipe away any accumulated metal shavings or debris. Inspect the cutting edge for any visible improvement. If the cutting edge appears dull or uneven, continue the sharpening process, making sure to maintain the correct angle and using light pressure.
Lift and wipe
After making several passes on the sharpening stone, lift the drill bit from the stone’s surface. Take a moment to wipe away any accumulated metal shavings or debris using a clean cloth. This allows you to get a clear view of the cutting edge for a more accurate assessment.
Visual inspection
Carefully examine the cutting edge of the drill bit to determine if there is any visible improvement. Look for signs of a restored sharpness, defined cutting edges, and a consistent shape across the entire edge. If the cutting edge still appears dull or uneven, it indicates that further sharpening is needed.
Angle and pressure adjustment
If the cutting edge is not showing the desired improvement, make sure to reassess your angle and pressure during sharpening. Ensure that you are maintaining the correct angle of approximately 59 degrees for most twist drill bits. Adjust the pressure if necessary, ensuring that it remains light and even throughout the sharpening process.
Additional passes
If the cutting edge requires further sharpening, continue the sharpening process. Place the drill bit back on the sharpening stone, align it at the correct angle, and use the circular motion technique with light pressure. Make additional passes on the stone, focusing on the areas that require further attention. Repeat this process until you achieve the desired sharpness and uniformity across the cutting edge.
Regular inspection
It is crucial to regularly inspect the cutting edge during the sharpening process. Pause after a few passes to lift the bit, wipe away debris, and visually assess the progress. This allows you to monitor your sharpening technique and make any necessary adjustments to ensure consistent and effective sharpening.
Patience and practice
Sharpening drill bits effectively requires patience and practice. It may take several attempts to master the sharpening technique and achieve the desired results. With practice, you will become more proficient at assessing the progress and knowing when the cutting edge has been adequately sharpened.
By regularly checking the progress, making necessary adjustments to angle and pressure, and continuing the sharpening process as needed, you can ensure that the cutting edge of the drill bit is being effectively restored. With time and practice, you will develop the skills to sharpen drill bits to the desired sharpness and quality.
Removing Burrs
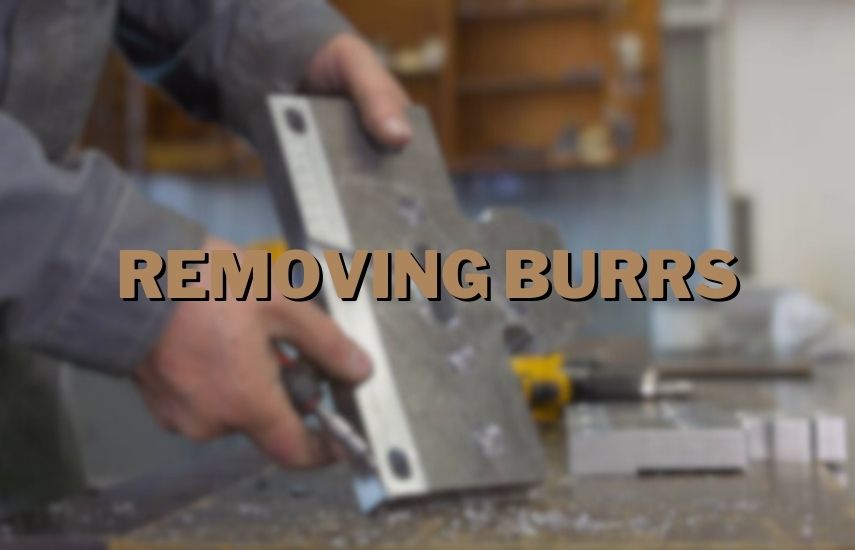
During the sharpening process, small burrs or metal flakes may form on the cutting edge. To remove these burrs and refine the cutting edge further, lightly drag the drill bit across the sharpening stone once or twice, applying minimal pressure. This step ensures a clean and sharp cutting edge.
Identify burrs
After sharpening the drill bit, inspect the cutting edge closely for any remaining burrs. Burrs typically appear as small metal flakes or rough areas along the edge. These burrs can affect the performance and precision of the drill bit, so it’s important to remove them.
Lightly drag across the stone
To remove the burrs, lightly drag the drill bit across the sharpening stone once or twice. Apply minimal pressure during this step to avoid removing excessive material or altering the cutting edge. The goal is to smooth out any rough areas or irregularities on the edge.
Maintain the correct angle
As you remove the burrs, ensure that you maintain the correct sharpening angle of approximately 59 degrees. This ensures that the cutting edge remains consistent and properly aligned.
Circular or straight motion
You can choose to use a circular motion or a straight dragging motion while removing burrs, depending on your preference and the design of the sharpening stone. Both techniques can be effective in refining the cutting edge and eliminating burrs. Experiment with both methods to determine which one works best for you.
Light pressure and minimal passes
It’s crucial to use light pressure and make only a few passes while removing burrs. Applying excessive pressure or making too many passes can risk altering the shape and angle of the cutting edge. The goal is to remove the burrs without compromising the overall sharpness of the drill bit.
Wipe and inspect
After removing the burrs, wipe the drill bit with a clean cloth to remove any remaining debris or metal shavings. Inspect the cutting edge once again to ensure that the burrs have been effectively removed and the cutting edge appears clean, sharp, and free from irregularities.
Removing burrs helps refine the cutting edge and ensures a clean, sharp, and precise drill bit. By following these steps and using minimal pressure, you can remove burrs without compromising the overall quality of the sharpened bit. Take your time during this step to achieve the desired result and ensure optimal performance during drilling operations.
Testing the Bit
Once you are satisfied with the sharpening process, remove the drill bit from the clamp or vise. Attach it to a drill and test it on a suitable material. If the bit cuts smoothly and efficiently, you have successfully sharpened the drill bit. If the performance is still unsatisfactory, consider re-evaluating the sharpening process or replacing the bit if necessary.
Detach from the clamp or vise
Once you feel satisfied with the sharpening process, carefully remove the drill bit from the clamp or vise. Ensure that you handle the bit safely to avoid any accidents or injuries.
Attach to a drill
Take the sharpened drill bit and securely attach it to a drill chuck. Ensure that it is firmly held in place to prevent any wobbling or instability during testing. Follow the manufacturer’s instructions or the specific guidelines for your drill to ensure proper attachment.
Select a suitable material
Choose a suitable material for testing the drill bit. The material should reflect the type of drilling tasks you commonly perform. For example, if you frequently work with wood, select a piece of wood for testing. Similarly, if you often drill into metal, choose a suitable metal surface.
Start the drilling process
With the drill bit securely attached and the chosen material ready, begin the drilling process. Apply the appropriate amount of pressure and engage the drill at a suitable speed for the chosen material. Observe the performance of the drill bit during drilling.
Assess smoothness and efficiency
While drilling, pay attention to the smoothness and efficiency of the bit. A well-sharpened drill bit should cut smoothly through the material with minimal effort. It should create clean and precise holes without excessive vibration or resistance.
Evaluate the results
After completing the drilling process, evaluate the results. If the bit cuts smoothly and efficiently, creating clean and precise holes, it indicates that the sharpening process has been successful. Congratulations! Your drill bit is now ready for use.
Re-evaluate if necessary
If the performance of the drill bit is still unsatisfactory, it may indicate that further adjustments are needed. Re-evaluate the sharpening process, paying close attention to the angle, sharpness, and overall condition of the cutting edges. Make any necessary refinements or consider re-sharpening the bit if required.
Replacement considerations
In some cases, despite proper sharpening, a drill bit may not perform up to the desired standards. If you have re-evaluated the sharpening process and the bit still does not meet your expectations, it may be time to consider replacing the bit. Overly worn or damaged bits may not be salvageable through sharpening alone.
Regularly testing and evaluating the performance of your drill bits after sharpening helps ensure that they are in optimal condition for various drilling tasks. By following these steps and assessing the bit’s performance, you can confidently determine if the sharpening process was successful or if further adjustments or replacements are necessary.
Conclusion (How To Sharpen A Drill Bit 3,600)
Sharpening your dull drill bits is a valuable skill that can greatly benefit you in extending the lifespan of your tools and maintaining their cutting performance. By following the recommended steps and utilizing a 3,600 grit sharpening stone, you can effectively restore the sharpness and efficiency of your drill bits. It’s important to remember a few key points as you embark on this process.
In conclusion, mastering the art of sharpening a drill bit is an essential skill for any DIY enthusiast or professional alike. The comprehensive guide on “How To Sharpen A Drill Bit 3,600” underscores the significance of maintaining sharp drill bits for efficient and precise drilling operations.
By following the step-by-step instructions outlined in the guide, individuals can ensure the longevity of their drill bits and achieve optimal drilling performance. Regular maintenance through proper sharpening not only enhances the tool’s effectiveness but also contributes to cost savings by extending the lifespan of drill bits.
Remember, safety precautions, such as wearing safety goggles and using a cooling lubricant, are paramount throughout the sharpening process. Whether you’re working on woodworking projects, metalwork, or any other task requiring drilling, the knowledge gained from this guide empowers craftsmen to work with confidence, precision, and the assurance of well-maintained tools.


