


Have you ever picked up a drill, only to be confused by the numbers on the side? You’re not alone. Understanding the numbers on a drill can be confusing, especially if you’re not familiar with power tools. But fear not!
What Does The Numbers On A Drill Mean? The numbers on a drill indicate the maximum diameter of the drill bit it can hold. For example, a drill with “1/4 inch” marked on it can hold a drill bit with a maximum diameter of 1/4 inch.
In this blog, we’ll explain what the numbers on a drill mean, and how they can help you choose the right drill for your needs. Whether you’re a DIY enthusiast or a professional, understanding these numbers is crucial for getting the most out of your drill. So, let’s dive in and demystify the numbers on a drill!
The Numbers on a Drill: The Basics
If you’re a DIY enthusiast or a professional contractor, you’ve likely encountered drills in your work. However, you might have wondered what the numbers on a drill mean, and how they relate to the tool’s performance.
Understanding the significance of these numbers is crucial in selecting the right drill for your job and getting the best results. We’ll cover the basics of drill numbers, and explain how to identify the most common numbers found on drills.
The significance of drill numbers
The numbers on a drill typically refer to two things: the drill bit size and the drill’s speed or power. The bit size is represented by the first number, which indicates the diameter of the bit in inches or millimeters. The second number represents the drill’s speed or power, which can range from low to high, depending on the drill’s capabilities.
Choosing the right drill bit size is critical in achieving the desired hole diameter. If the bit is too small, you won’t get the size of the hole you need, and if it’s too large, you’ll end up with a hole that’s too big. The drill’s speed or power, on the other hand, determines how quickly and efficiently the drill can cut through the material. A low-speed drill may struggle with harder materials like metal, while a high-speed drill may be too powerful for softer materials like wood.
Identifying the most common numbers on drills
The most common drill sizes range from 1/16 inch to 1/2 inch, with increments of 1/64 inch or 1mm. These sizes are often used for drilling holes in wood, metal, plastic, and other materials. The most common drill speeds range from 500 to 2,500 revolutions per minute (RPM), with higher speeds generally used for harder materials.
Drills with a speed range of 0-600 RPM are considered low-speed drills and are suitable for drilling through softer materials like wood, plastic, and drywall. Drills with a speed range of 600-1,500 RPM are medium-speed drills and are suitable for drilling through harder materials like metals and thicker wood. Drills with a speed range of 1,500 RPM or higher are high-speed drills and are suitable for drilling through the hardest materials like steel and concrete.
Drill Speed and Torque Settings

Drills are versatile tools that can be used for a wide range of projects, from DIY home repairs to industrial construction projects. Understanding the different speed and torque settings on a drill is essential for achieving the desired results.
Understanding Drill Speed Settings
Drill speed settings refer to the number of revolutions per minute (RPM) that the drill’s chuck can rotate. Most drills have variable speed settings that allow you to adjust the RPM based on the type of material you’re drilling. Lower RPMs are ideal for drilling into harder materials like metal, while higher RPMs are better for softer materials like wood and plastic.
It’s essential to match the drill speed with the material you’re drilling to prevent overheating or damaging the bit. For example, drilling into metal at a high RPM can cause the bit to overheat and wear down quickly. Similarly, drilling into wood at a low RPM can result in a rough finish or cause the bit to bind in the material.
How Torque Settings Impact Your Drilling Experience
Torque settings on a drill refer to the amount of rotational force that the drill can apply. High torque settings are ideal for drilling into harder materials, while low torque settings are better for softer materials. The torque setting also impacts the amount of control you have over the drill.
When drilling into hard materials, a higher torque setting can help prevent the drill bit from slipping or stalling. However, if you’re drilling into a softer material, a high torque setting can cause the bit to overdrive and damage the material. Higher torque settings can make it more difficult to control the drill, so it’s essential to adjust the torque setting based on the material you’re drilling.
Choosing the Right Speed and Torque for Your Project
Choosing the right speed and torque settings for your project depends on several factors, including the type of material you’re drilling, the size of the bit, and the depth of the hole you’re drilling. As a general rule, start with a lower speed and torque setting and adjust as needed.
For drilling into metal, start with a low to medium speed and high torque setting. For drilling into wood or plastic, start with a medium to high speed and low torque setting. If you’re unsure about the right speed and torque setting for your project, consult the drill’s manual or seek advice from a professional.
Clutch Settings on a Drill
When it comes to drilling, the clutch setting on a drill is an important feature that is often overlooked. The clutch is a mechanism that controls the amount of torque applied to the drill bit, which can prevent stripping or overdriving screws, as well as damage to the material being drilled.
What clutch settings are and why they matter
Clutch settings are a feature found on most modern cordless drills that allow users to control the amount of torque applied to the drill bit. The clutch consists of a series of numbered settings that adjust the amount of torque applied to the drill bit. When the clutch setting is low, the drill bit will spin at a slower speed, with less force applied. As the clutch setting is increased, more torque is applied to the drill bit, allowing it to spin at a higher speed with more force.
The main advantage of clutch settings is that they allow users to apply the correct amount of force to the material being drilled, without overdriving or stripping screws or damaging the material. This is especially important when drilling into soft or delicate materials, such as drywall or plaster.
Common clutch setting numbers and their applications
Clutch settings are typically numbered from 1 to 20 or higher, depending on the drill model. The following are some common clutch setting numbers and their applications:
- Clutch setting 1-3: These settings are ideal for drilling into soft materials such as drywall or plasterboard. The low torque prevents the bit from overdriving or stripping screws.
- Clutch setting 4-7: These settings are ideal for drilling into softer woods such as pine or cedar. The increased torque allows the bit to drill through the material with ease.
- Clutch setting 8-12: These settings are ideal for drilling into harder woods such as oak or maple. The increased torque allows the bit to drill through the denser material without stalling.
- Clutch setting 13-16: These settings are ideal for drilling into metal, such as steel or aluminum. The high torque allows the bit to cut through the material without overheating or breaking.
- Clutch setting 17-20: These settings are ideal for driving screws or bolts into harder materials such as concrete or brick. The high torque ensures that the screws or bolts are driven in with maximum force.
Tips for adjusting clutch settings for various materials
When adjusting clutch settings, it is important to choose the right setting for the material being drilled. Here are some tips for adjusting clutch settings for various materials:
- Soft materials: Use a lower clutch setting to prevent overdriving or stripping screws.
- Harder materials: Use a higher clutch setting to ensure that the drill bit cuts through the material with ease.
- Metal: Use a higher clutch setting to prevent the bit from overheating or breaking.
- Screws or bolts: Use a higher clutch setting to ensure that the screws or bolts are driven in with maximum force.
It is important to note that clutch settings may need to be adjusted depending on the size and type of bit being used. For example, a larger bit may require a higher clutch setting to ensure that it can cut through the material with ease. Experiment with different clutch settings to find the right setting for the job at hand.
Drill Chuck Size and Capacity
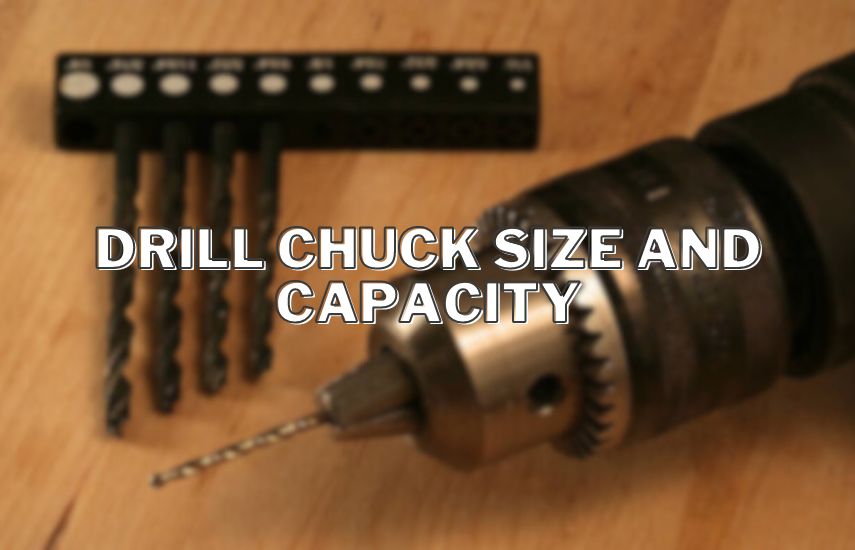
When it comes to selecting the right drill for your project, understanding the relationship between drill chuck size and capacity is crucial. The chuck size of a drill refers to the diameter of the opening that holds the drill bit in place. The size of the chuck can impact the size of the drill bit that can be used, as well as the power and torque of the drill.
The Relationship Between Chuck Size and Drill Bit Capacity
The chuck size of a drill determines the maximum size of drill bit that can be used. For example, a drill with a 1/4 inch chuck can accommodate drill bits with shank sizes of up to 1/4 inch. Using a drill bit with a larger shank size than the chuck can accommodate can cause the bit to wobble or even come loose during use. This can be dangerous and also lead to imprecise drilling.
Common Chuck Sizes and Their Implications
The most common chuck sizes for drills are 1/4 inch, 3/8 inch, and 1/2 inch. A 1/4 inch chuck is typically found on smaller drills, such as those used for woodworking or light-duty household projects. A 3/8 inch chuck is a versatile option that can accommodate a range of drill bit sizes and is suitable for most DIY projects. A 1/2 inch chuck is found on larger, more powerful drills and is capable of accommodating larger drill bits for heavy-duty projects.
It’s important to note that chuck size isn’t the only factor that determines the capacity of a drill. The power and torque of the drill also play a role in its capacity. A drill with a larger chuck size may not necessarily be more powerful than one with a smaller chuck size.
Selecting the Appropriate Chuck Size for Your Project
When selecting a drill for your project, it’s important to consider the size and type of drill bits you’ll be using. If you plan on using smaller drill bits for light-duty projects, a drill with a 1/4 inch chuck should suffice. For larger projects or heavier-duty tasks, a drill with a 3/8 inch or 1/2 inch chuck may be necessary.
It’s also important to consider the type of material you’ll be drilling into. Harder materials like metal or concrete may require a more powerful drill with a larger chuck size to accommodate the larger, stronger drill bits needed for those materials.
In summary, understanding the relationship between drill chuck size and capacity is important for selecting the appropriate drill for your project. Consider the size and type of drill bits you’ll be using, as well as the type of material you’ll be drilling into, to determine the appropriate chuck size and drill for your needs.
Voltage and Battery Life
When it comes to drills, voltage is a critical factor that can greatly affect the performance of the tool. Voltage determines the power output of the drill, which in turn affects how well it can handle different materials and the speed at which it can complete tasks.
Battery life is another important factor to consider when choosing a drill, as it determines how long you can use the tool before needing to recharge or replace the battery.
How voltage affects drill performance
Voltage is the primary factor that determines the power output of a drill, which is measured in units of watts. The higher the voltage, the more power the drill can deliver, and the faster and more efficiently it can drill through different materials. For example, a 12-volt drill is suitable for light-duty tasks such as drilling through drywall or wood, while an 18-volt or higher drill is better suited for heavier tasks like drilling through metal or concrete.
To power output, voltage also affects the speed of the drill. Higher voltage drills generally have higher RPMs (revolutions per minute), which means they can spin faster and drill holes more quickly. However, higher RPMs also mean that the drill can generate more heat, which can lead to overheating and damage to the drill or the material being drilled.
Common voltage numbers and their characteristics
Drills are available in a range of voltage options, with the most common being 12V, 18V, and 20V. Here are some characteristics of each voltage level:
- 12V: This is a lower voltage option that is suitable for light-duty tasks such as drilling through wood, drywall, and plastic. These drills are typically smaller and lighter than higher voltage options, making them easier to maneuver in tight spaces.
- 18V: This is a mid-range voltage option that is suitable for a wide range of tasks, including drilling through metal and concrete. These drills are more powerful than 12V drills and can handle heavier workloads, but they are also typically larger and heavier.
- 20V: This is a higher voltage option that is suitable for heavy-duty tasks such as drilling through thick metal or concrete. These drills are the most powerful option, but they are also the largest and heaviest.
It’s important to note that the voltage number alone does not determine the quality or performance of a drill. Other factors such as the motor power, chuck size, and drill speed also play a role in how well the drill performs.
Tips for maximizing battery life and performance
Battery life is a critical factor to consider when choosing a drill, as it determines how long you can use the tool before needing to recharge or replace the battery. Here are some tips for maximizing battery life and performance:
- Use the right battery for the job: Different batteries are designed for different tasks and can have varying levels of power and runtime. Make sure you choose the right battery for the job to get the best performance and longest runtime.
- Keep the battery cool: Heat can reduce the lifespan of your battery and decrease its performance. Try to keep the battery cool during use and avoid leaving it in direct sunlight or other hot environments.
- Charge the battery correctly: Follow the manufacturer’s instructions for charging the battery to ensure that it charges correctly and efficiently. Overcharging or undercharging can damage the battery and reduce its lifespan.
- Store the battery correctly: When not in use, store the battery in a cool, dry place and away from direct sunlight or other heat sources. This can help preserve the battery’s lifespan and performance.
Drilling Techniques and Best Practices

When it comes to drilling, there is more to it than just picking up a drill and going to work. Using the proper technique and understanding the various settings on a drill can make a significant difference in the accuracy and cleanliness of your holes, as well as your overall safety.
Proper drilling technique for accurate and clean holes
To achieve accurate and clean holes, you need to employ the proper drilling technique. Here are some tips to help you:
- Mark your drilling spot: Before drilling, mark your drilling spot using a pencil or a marker. This will help you drill in the right spot and avoid any unnecessary mistakes.
- Start with a small pilot hole: If you’re drilling a large hole, start with a small pilot hole to guide the larger drill bit. This will help you keep the drill bit from wandering and ensure that you drill the hole in the right spot.
- Use steady pressure: When drilling, use steady and even pressure to prevent the drill bit from jumping around. This will help you drill straight and maintain accuracy.
- Withdraw the drill bit frequently: Depending on the material you’re drilling, it’s essential to withdraw the drill bit frequently to prevent overheating and ensure that the hole is clean.
How different drill settings can affect your technique
Different drill settings can affect your drilling technique significantly. Here are some examples:
- Speed: Changing the speed of your drill can help you control the drill bit better. For example, lower speeds are better for drilling through hard materials like metal, while higher speeds are better for softer materials like wood.
- Torque: Torque settings control the amount of force that the drill exerts on the material being drilled. Higher torque settings are better for drilling through thicker materials, while lower torque settings are better for softer materials.
- Clutch: The clutch on a drill controls the amount of torque that the drill exerts. This can be helpful for preventing overdrilling or stripping the threads on screws.
Safety tips for using drills with various settings
When using a drill, safety should be a top priority. Here are some safety tips to keep in mind:
- Wear safety gear: Wear safety glasses, gloves, and ear protection when using a drill.
- Use the right drill bit: Using the wrong drill bit can cause the drill to slip or even break, which can be dangerous.
- Keep your drill bits sharp: Dull drill bits can cause the drill to work harder and generate more heat, which can be dangerous.
- Check for obstructions: Before drilling, check for any obstructions that could cause the drill to jam or bind.
- Unplug your drill when changing settings: When changing drill bits or adjusting settings, make sure to unplug your drill first to prevent accidental start-ups.
Conclusion (What Does The Numbers On A Drill Mean)
The numbers on a drill represent the size of the chuck, which is the part that holds the drill bit. The size is usually given in fractions of an inch or millimeters. A drill with a chuck size of 3/8 inch can hold drill bits with a maximum diameter of 3/8 inch.
In a nutshell, the numbers on a drill serve as a secret code that unlocks the drill’s superpowers. Picture them as the drill’s magical language. The bigger the numbers, the mightier the drill’s spin. But don’t get lost in the number maze!
Just remember, low numbers are for delicate dances, like tiptoeing through paper, while high numbers are for tough battles with walls and metals. So, next time you hold a drill, decode its numbers like a hero reading a treasure map. Now you’re all set to spin and conquer with the wisdom of drill numbers on your side!


