Are you tired of making mistakes when drilling? We’ve all been there, and it can be frustrating. But fear not! This guide is here to help you avoid those drilling mishaps once and for all. Drilling might seem straightforward, but there’s more to it than meets the eye. Whether you’re a seasoned DIYer or just starting, understanding the ins and outs of drilling is essential. From selecting the right tools to nailing the proper technique, we’ve got you covered.
The Ultimate Guide To Avoiding Drilling Mistakes? To avoid drilling mistakes, always start with careful planning. Measure twice, mark your spot accurately, and use the right drill bit for the material. Keep a steady hand, maintain proper speed, and don’t rush. Safety goggles and hearing protection are a must. Practice patience for perfect results.
In the upcoming sections, we’ll take you through the do’s and don’ts of drilling. Say goodbye to uneven holes, damaged surfaces, and wasted time. With the knowledge you gain here, you’ll be well-equipped to tackle drilling projects with confidence. Let’s get started on the path to flawless drilling!
Choose the Right Drill Bit for the Job
Know Your Material
Different materials require different drill bits. For wood, opt for Brad Point bits; for metal, use HSS (High-Speed Steel) bits; and for masonry, go with masonry bits. Knowing your material is the first step to getting it right.
Consider Bit Type
There are various types of drill bits, including twist bits, spade bits, and Forstner bits, each designed for specific tasks. Twist bits are versatile, spade bits are ideal for larger holes, and Forstner bits create clean, flat-bottomed holes. Match the bit type to your project.
Size Matters
Drill bit sizes vary, and choosing the right one depends on the hole diameter you need. Measure your project carefully, and select a bit that matches the required size. Using the wrong size can lead to imprecise holes or damage to your material.
Coating and Material
Some drill bits come with coatings like titanium or cobalt, which enhance durability and performance. Consider the bit’s material and coating, especially for heavy-duty jobs. These features can extend the life of your drill bit.
Speed and RPM
Adjust your drill’s speed and RPM (rotations per minute) according to the type of material and bit you’re using. High-speed settings are suitable for soft materials, while slower speeds are better for harder ones. Refer to your drill’s manual for guidance.
Using the Right Drill Speed
Match Speed to Material
Different materials require different drill speeds. For softer materials like wood and plastics, use higher speeds. For harder materials like metal and masonry, opt for slower speeds. The right match prevents overheating and damage.
Consult the Manufacturer’s Guidelines
Every drill and drill bit comes with manufacturer recommendations for the ideal speed settings. Refer to your tool’s manual and bit packaging for these guidelines. They’re your best reference point.
Start Slow and Gradually Increase Speed
When starting a hole, begin at a slower speed. This provides better control and reduces the risk of the bit slipping. As the hole deepens, you can gradually increase the speed for efficiency.
Use Variable Speed Drills
Variable speed drills are versatile and allow you to adjust the speed according to your needs. They are particularly useful for projects that involve various materials and hole sizes.
Pay Attention to Heat
Friction generates heat during drilling. If you notice smoke or burning smells, it’s a sign that your drill speed is too high. Slow down immediately to prevent overheating and damage to the bit.
Applying Pressure Wisely
Start Lightly
Begin drilling with gentle pressure. Applying too much force right away can cause the drill to slip or the bit to break. Gradually increase the pressure as you feel the bit digging into the material.
Let the Drill Bit Do the Work
Don’t force the drill. Allow the drill bit to do its job by applying steady, even pressure. Pushing too hard can lead to overheating, slower progress, and potential damage to the bit.
Maintain a Right Angle
Keep the drill perpendicular to the material’s surface. This ensures that the hole you’re drilling remains straight and clean. Using a right-angle guide or a square can help maintain the correct angle.
Control Your Drill
Maintain a firm grip on the drill to control its movement. Avoid excessive wobbling or shaking, as this can result in imprecise holes. Steady hands lead to better drilling accuracy.
Be Mindful of Material
Different materials require different levels of pressure. For softer materials, like wood, you can apply more pressure. In harder materials, like metal or masonry, use a lighter touch to prevent damage.
Drill in a Straight Line
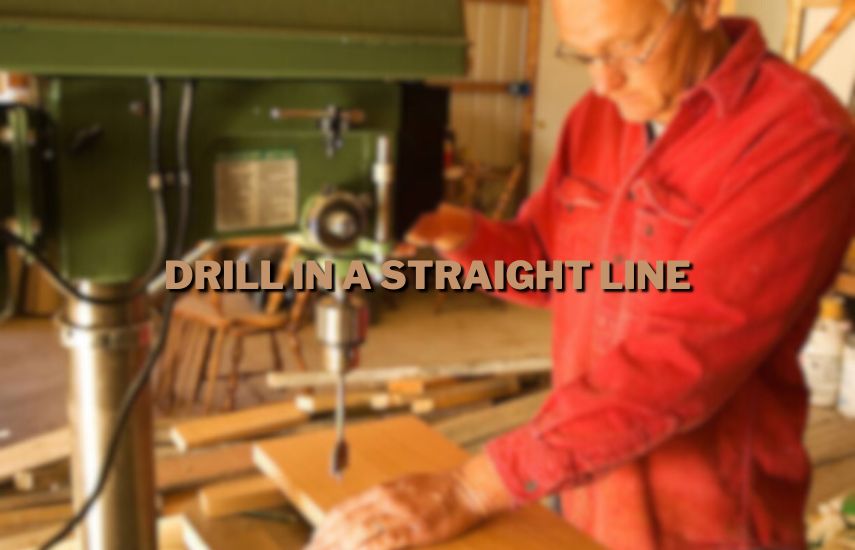
Mark Your Spot
Before you start drilling, mark the exact spot where you want the hole. Use a pencil, a center punch, or a template to create a visible reference point. This mark will serve as your guide.
Use a Right-Angle Guide
A right-angle guide or square can help you maintain a 90-degree angle between the drill and the material. Hold the guide firmly against the surface to keep your drill on track.
Go Slow and Steady
Start your drill at a slow speed. This allows you to have better control and accuracy. Gradually increase the speed as you progress, always keeping an eye on the alignment.
Maintain Even Pressure
Apply consistent and even pressure on the drill. Avoid leaning to one side, which can cause the bit to veer off course. Keep your hand steady to ensure a straight hole.
Check Frequently
Pause periodically to check if the drill is still aligned with your reference mark. Adjust as needed to correct any deviations. It’s easier to fix alignment issues early in the drilling process.
Wear Safety Glasses
Protecting your eyes is paramount when working with tools and especially when drilling.
Eye Protection Importance
Wearing safety glasses safeguards your eyes from flying debris, wood chips, metal shavings, or any other particles that may be ejected during drilling. Even a small piece can cause severe eye injury, making eye protection important.
Choose the Right Safety Glasses
Select safety glasses that are ANSI-approved. These glasses meet safety standards and offer the best protection. Make sure they fit snugly and comfortably on your face to prevent them from slipping off during work.
Always Wear Them
Don’t overlook the importance of safety glasses, even for quick tasks. Accidents can happen unexpectedly, so make it a habit to wear them every time you pick up a drill, ensuring continuous eye protection.
Keep Them Clean
Dirty or scratched safety glasses can hinder your vision. Regularly clean them with mild soap and water, and store them in a protective case when not in use to prevent scratches.
Regular Eye Check-Ups
Even with safety glasses, accidents can occur. If you ever experience an eye injury, seek medical attention immediately. Regular eye check-ups are also important to ensure your eyes are in good health.
Clean Up After Yourself
Keeping our surroundings clean and tidy is a responsibility we all share. It’s not just about making things look nice; it’s about taking care of our environment, our homes, and our communities.
Responsibility Begins At Home
Start by looking after your own space. Whether it’s your bedroom, living room, or kitchen, make a habit of cleaning up after yourself. Don’t leave dirty dishes in the sink, and put your clothes in the laundry basket instead of on the floor. A tidy home is a comfortable and healthy home for you and your family.
Littering Hurts The Environment
When you’re outside, remember that littering is harmful to the environment. Throwing trash on the ground or into water bodies can lead to pollution, harm wildlife, and create eyesores in our communities. Always use trash cans and recycling bins provided in public spaces, and pick up after your pet to keep our neighborhoods clean.
Recycle and Reduce Waste
Reduce your environmental footprint by recycling materials like paper, plastic, glass, and metal. Make an effort to reduce waste by buying products with less packaging, reusing items when possible, and repairing things instead of throwing them away. Small changes can make a big difference in reducing landfill waste.
Community Involvement
Get involved in community clean-up efforts. Join local clean-up events, like park clean-ups or beach clean-ups, to help keep public spaces pristine. Encourage your friends and family to participate too. By working together, we can make our communities cleaner and more attractive places to live.
Lead By Example
Be a role model for others when it comes to cleanliness. Show your friends, family, and neighbors the importance of cleaning up after themselves and taking care of the environment. Your actions can inspire positive changes in your community and beyond.
Conclusion (The Ultimate Guide To Avoiding Drilling Mistakes)
To avoid drilling mistakes, measure accurately, use the right tools, prioritize safety, and trust your instincts. Learn from errors, and take your time for successful DIY projects.
In wrapping up our guide to avoiding drilling mistakes, remember that prevention is key. By taking simple steps like measuring twice, using the right tools, and knowing your drilling surface, you can save time, money, and headaches. Always prioritize safety, wear protective gear, and follow the instructions.
Don’t rush; patience pays off. Trust your instincts, and if something doesn’t feel right, pause and reevaluate. Mistakes happen, but learning from them is the ultimate tool in your DIY kit. So go ahead, tackle those projects with confidence, and keep these tips close to ensure smooth sailing on your drilling adventures.
FREQUENTLY ASKED QUESTIONS
How do you prevent mess when drilling?
When it comes to preventing mess when drilling, there are a few simple steps you can follow. First, make sure to use a drilling template or guide if you have one, as this will help you create precise holes without any guesswork. Consider using a piece of masking tape on the surface where you’ll be drilling.
This can help prevent wood or drywall from splintering and creating a messy edge. When drilling into walls, be cautious of dust and debris; you can attach a vacuum cleaner hose near the drilling area to catch most of it. Lastly, go slow and steady with the drill. Applying too much force or speed can lead to a messy and imprecise hole. Take your time, and you’ll have a neater result.
How can I improve my drilling accuracy?
To improve your drilling accuracy, it’s crucial to start with the right tools. Choose the appropriate drill bit for your material and the size of the hole you need. Measure and mark your drilling spot precisely, using a pencil or a marker, and consider using a center punch to create a small indentation for the drill bit to start in.
When you begin drilling, keep the drill perpendicular to the surface to prevent it from wandering. Maintain a firm grip on the drill, but don’t push too hard; let the drill bit do the work. If you’re drilling a deep hole, periodically withdraw the bit to remove debris and cool it down. Practicing your technique and being patient will also help you improve your drilling accuracy over time.
What is the most important factor in correct drilling technique?
The most important factor in correct drilling technique is maintaining proper alignment and control of the drill. Keeping the drill bit perpendicular to the surface you’re drilling into ensures that your hole will be straight and accurate.
If the drill bit tilts, you risk creating a hole that’s off-center or at an angle, which can lead to inaccuracies and potentially even damage to your project. So, focus on your hand and wrist control, keeping a steady hand and maintaining the right angle throughout the drilling process. This attention to detail will greatly contribute to the correctness of your drilling technique.
What is drilling method in teaching?
In teaching, the drilling method is a teaching technique used to help students practice and reinforce specific skills or concepts. It involves repetitive and focused practice, often with the teacher providing clear and consistent feedback. The drilling method is especially useful in subjects like mathematics, language learning, or music, where mastering fundamentals is essential. For example, in language learning, students might engage in vocabulary drills or pronunciation drills to improve their language skills.
In mathematics, drills can help students master mathematical operations like addition, subtraction, multiplication, and division. The key to effective drilling in teaching is to strike a balance between repetition and engagement, ensuring that students practice enough to build proficiency while remaining motivated and interested in the learning process.


