

Drills are essential tools for any DIY enthusiast or professional. Whether you’re drilling a hole in wood, metal, or concrete, the drill bit is the key to getting the job done right. But if you’re new to drilling, you might wonder how to put a drill bit into a drill. You may have just bought a new drill or never used one before. Whatever the reason, you’ve come to the right place.
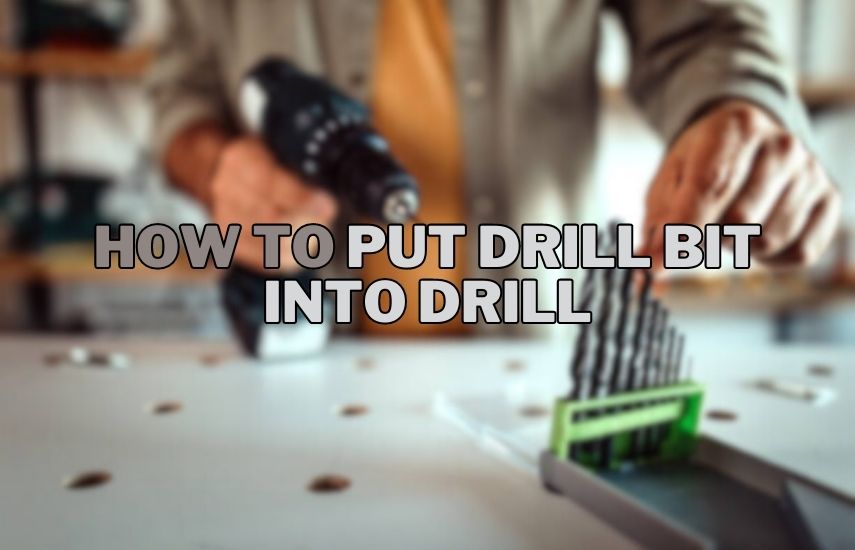
How To Put Drill Bit Into Drill? First, to put a drill bit into a drill, ensure the drill machine is switched off and unplugged. Then, loosen the chuck by rotating it counterclockwise. Insert the bit into the chuck, making sure it’s aligned straight. Finally, tighten the chuck by turning it clockwise.
In this blog, we’ll walk you through the simple steps to install your drill bit and get ready to use it so you can confidently tackle your next project.
Understanding Your Drill
If you are new to drilling, one of the first things you need to understand is how to use a drill. Understanding the components of a drill machine and how to use them properly will help you achieve the desired results.
Key Components Of A Drill
Before you start using a drill, knowing its key components is essential. A drill machine typically consists of a motor, a chuck, a trigger switch, a speed control, and a directional switch. The engine is the primary power source that drives the drill bit. The chuck is the part of the drill that holds the drill bit in place.
The trigger switch controls the speed of the drill, and the speed control enables you to adjust the speed of the drill to suit the task at hand. Finally, the directional switch allows you to change the direction of the drill’s rotation.
Different Types Of Chucks
The chuck is an essential part of the drill that holds the drill bit in place. There are two main types of chucks: keyed and keyless. A keyed chuck requires a key to tighten or loosen the jaws that grip the drill bit.
On the other hand, a keyless chuck can be tightened or loosened by hand. Keyless chucks are generally more convenient but may not provide as tight a grip as a keyed chuck. Choosing the correct type of chuck for your drilling needs is essential.
Understanding Drill Settings
Drills come with various settings that allow you to adjust the speed and torque of the drill machine. The speed setting enables you to adjust the speed of the drill, and the torque setting allows you to adjust the force the drill exerts on the material you’re drilling.
You should choose the appropriate speed and torque settings based on the material you’re drilling and the drill bit size you’re using. It’s essential to read the manufacturer’s instructions carefully and choose the correct settings for the task.
Choosing The Right Drill Bit
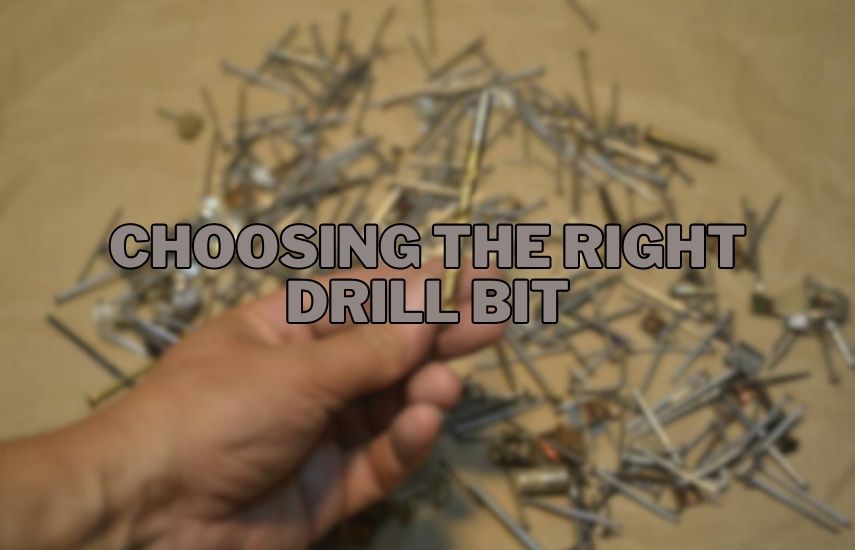
Choosing the right drill bit is essential for ensuring that your drilling project is successful. There are many factors to consider when selecting a drill bit, including the material you are drilling, the size of the hole you need to create, and the type of drill you use. We will explore the factors you must consider when choosing a drill bit, the common types of drill bits and their applications, and how to match the drill bit to the material being drilled.
Factors To Consider When Choosing A Drill Bit
When selecting a drill bit, it is essential to consider several factors to ensure you get the best results. Here are some of the factors to keep in mind:
- Material Being Drilled – Different drill bits are designed to work with specific materials. For instance, a wood drill bit will not work well when drilling through metal. So, choosing a drill bit suitable for the material you are drilling is crucial.
- Size of Hole – The size of the hole you need to create will determine the type and size of the drill bit you need. For instance, if you need a large hole, you will require a more significant drill bit; if you need a small hole, a more minor drill bit will be suitable.
- Type of Drill – Different drills require specific types of drill bits. For example, a hammer drill requires a masonry drill bit, while a regular drill requires a twist bit.
- Shank Size – The drill bit’s shank size must fit the drill machine’s chuck. Therefore, you need to ensure that the drill bit you choose has the appropriate shank size for your drill.
Common Types Of Drill Bits And Their Applications
Drill bits come in different shapes and sizes, each with a specific purpose. Here are some of the most common types of drill bits and their applications:
- Twist Drill Bits – These are the most common type of drill bits and are used to drill through wood, plastic, and metal.
- Masonry Drill Bits – These are used for drilling through brick, stone, and concrete.
- Spade Drill Bits – These are used to drill large holes in wood.
- Forstner Drill Bits – These are used for drilling flat-bottomed holes in wood.
- Hole Saw Drill Bits – These are used for cutting large diameter holes in wood, plastic, and metal.
Matching The Drill Bit To The Material Being Drilled
To ensure that your drilling project succeeds, you must match the drill bit to the material being drilled. Here are some tips to help you compare the drill bit to the material being prepared:
- Wood – Use twist drill bits, spade drill bits, or Forstner drill bits.
- Metal – Use twist drill bits or step drill bits.
- Masonry – Use masonry drill bits.
- Plastic – Use twist drill bits or hole saw drill bits.
Installing A Drill Bit
If you are new to drilling, you might find putting a drill bit into the drill challenging. However, it is an essential skill that you need to learn to make the most of your drilling machine.
Step 1: Safety Precautions And Preparation
Before you begin, it’s essential to take some safety precautions. First, ensure your drill is unplugged or the battery is removed. This will prevent any accidental drill from starting while you work on it. Second, wear safety glasses to protect your eyes from debris or metal shavings that may come off during drilling.
Next, select the appropriate drill bit for the job you are doing. Ensure the drill bit is compatible with your type of drill. If you need help deciding which bit to use, refer to the manufacturer’s manual or seek advice from a hardware store professional.
Step 2: Loosening The Chuck
The chuck is the part of the drill that holds the bit in place. To insert a new bit, you need to loosen the chuck. Depending on your drill machine, you can turn the chuck counterclockwise by hand or use a chuck key that came with your drill.
If you have a keyless chuck, you can loosen it by twisting the chuck counterclockwise with your hand. However, if your drill has a keyed chuck, insert the key into the hole located on the side of the chuck, and turn it counterclockwise to loosen it.
Step 3: Inserting The Drill Bit
With the chuck loosened, insert the drill bit into the opening. Make sure the bit is aligned with the jaws of the chuck, and push it in as far as it will go. You can check the alignment by looking at the bit from the side and ensuring it’s straight.
Step 4: Tightening The Chuck
Once the drill bit is in place, you must tighten the chuck to hold it securely. To do this, turn the chuck clockwise by hand or with the chuck key until it’s tight enough to control the drill bit firmly in place. Avoid over-tightening the chuck, as it can damage the bit.
Step 5: Testing The Drill Bit Installation
Before you start drilling, it’s essential to test the bit installation. Hold the drill perpendicular to the ground and turn it on. Listen for any unusual noises or wobbling, which could indicate that the bit is not installed correctly. If everything seems okay, you’re ready to start drilling.
Tips For Prolonging Drill Bit Life
Drill bits are essential tools for any DIY enthusiast or professional, but they can be quite expensive, and their lifespan can be limited if not properly taken care of. We will discuss some valuable tips on prolonging your drill bits’ life and getting the most out of your investment.
Proper Storage And Organization
One of the most critical factors in prolonging the life of your drill bits is proper storage and organization. When not used, drill bits should be kept in a dry and cool place, away from direct sunlight and humidity. It’s also essential to store them in an organized manner so you can easily find the size and type of bit you need for your project.
Investing in a drill bit index or case is an excellent way to keep your drill bits organized and protected. A drill bit index is a compact case that has slots to hold various sizes of drill bits. These cases are usually made from durable materials like hard plastic or metal, which protect your bits from damage.
Regular Maintenance And Cleaning
Regular maintenance and cleaning are crucial for the longevity of your drill bits. After each use, you should thoroughly clean your bits to remove debris or metal shavings. A simple wipe with a clean cloth or brush should do the trick. You can use a cleaning solution designed explicitly for drill bits for more challenging cleaning jobs.
It’s also essential to keep your drill bits sharp to ensure they work at their best. Sharpening your drill bits is a simple process that can be done with a drill bit sharpener or a bench grinder.
Knowing When To Replace Your Drill Bits
Knowing when to replace your drill bits is crucial for maintaining the quality of your work and ensuring your safety. If your drill bit is cutting through the material slower than it used to, it may be time to replace it. Other signs that indicate it’s time to replace your drill bit include chipping or cracking of the bit, excessive vibration or wobbling, or visible wear on the tip.
Conclusion (How To Put Drill Bit Into Drill)
Putting a drill bit into a drill is easy. Start by ensuring the drill machine is turned off and unplugged. Then, loosen the chuck by turning it counterclockwise. Insert the drill bit and adjust its position to ensure it’s straight. Finally, tighten the chuck by turning it clockwise.
When it comes to completing any DIY or professional project that involves drilling, the proper installation of the drill bit is crucial. We have covered step-by-step instructions on putting a drill bit into a drill, but it’s essential to understand the importance of proper installation.
By ensuring that your drill bit is installed correctly, you can avoid issues such as wobbling, breakage, and reduced drilling accuracy. Ultimately, proper drill bit installation is a critical aspect of achieving your project’s desired results, so paying attention to this often overlooked but vital step is essential.


