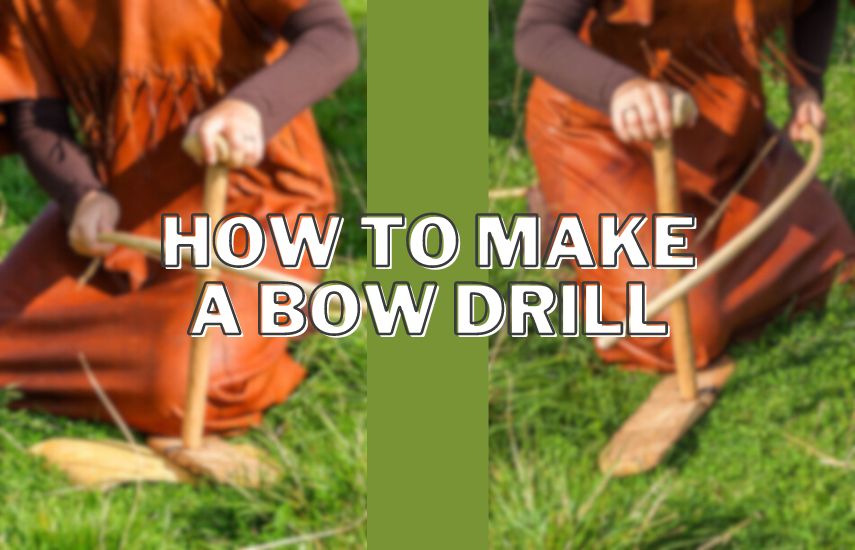
Have you ever found yourself stranded in the wilderness with no means of starting a fire? Or perhaps you’re a seasoned outdoorsman looking to up your survival skills. Either way, the bow drill is a primitive but effective tool for starting fires without matches or lighters.
How To Make A Bow Drill? To make a bow drill, start by finding a straight stick for the bow and another stick for the drill. Cut a small notch in the drill, and use the bow to rotate the drill back and forth. The friction should create a coal that can be used to start a fire.
In this guide, we’ll walk you through the steps of creating your own bow drill set and teach you how to use it to produce a flame. Whether you’re a survival enthusiast or just looking for a fun new skill to learn, making a bow drill is a great way to connect with nature and prepare yourself for any situation.
Components of a Bow Drill
Making fire without any modern tools can be a daunting task, but with the help of a bow drill, it’s easier than you might think. A bow drill is a simple tool that uses friction to create heat, which can then be used to start a fire. The bow drill consists of five main components, each of which plays a crucial role in the fire-making process. We’ll go over each component in detail to help you understand how to make a bow drill.
The Spindle
The spindle is the part of the bow drill that generates the heat through friction. It’s a long, thin rod that is made from a hard wood such as hickory, oak or maple. The spindle should be straight, smooth and ideally around 12-18 inches in length.
It’s important to choose a wood that is dry and free from knots, as this will affect its ability to create friction. The tip of the spindle should be sharpened to a point and the other end should be rounded.
The fireboard
The fireboard is the base on which the spindle rotates. It’s usually made from a soft wood such as cedar or pine, as these woods are easier to carve. The fireboard should be flat, smooth and around 8-10 inches in length.
To use the fireboard, a small depression is carved into it using a knife. This depression is called the “hearth” and it’s where the spindle will create friction to produce the heat needed to start a fire.
The bow
The bow is used to rotate the spindle, which creates the friction needed to start a fire. The bow can be made from any type of flexible wood, such as willow, ash or hazel. It should be around 2-3 feet in length and should be slightly curved. A cord is tied to both ends of the bow, and this cord is what will be used to rotate the spindle. It’s important to choose a cord that is strong and won’t break easily.
The bearing block
The bearing block is used to hold the top end of the spindle in place while it’s being rotated. It’s usually made from a hard wood such as oak or maple, and should be around 3-4 inches in length.
A small depression is carved into the bearing block, which is where the top end of the spindle sits. The bearing block should be held firmly in place with the non-dominant hand while the bow is used to rotate the spindle with the other hand.
The tinder bundle
The tinder bundle is the material that will be ignited by the heat generated from the bow drill. It can be made from any type of dry, fibrous material, such as grass, bark or dried leaves. To make a tinder bundle, the material is gathered and then twisted together tightly to form a ball.
The ball is then placed in the depression on the fireboard, and the spindle is rotated using the bow. As the spindle creates friction, the heat generated will eventually ignite the tinder bundle, creating a flame that can be used to start a fire.
Selecting Materials

When it comes to making a bow drill, selecting the right materials is crucial. The success of your fire-making endeavor depends on the quality of the materials you use. We will discuss how to select the appropriate wood for your spindle and fireboard, how to prepare them, how to construct the bow, and how to craft the bearing block. We will also cover the different types of tinder you can use to create an ember.
Choosing the right wood
The type of wood you use for your bow drill can make or break your fire-making success. The ideal wood for the spindle and fireboard should be dry, straight-grained, and of medium hardness. Softwoods like cedar or pine are usually not recommended because they are too soft and will quickly wear down. Hardwoods like oak, hickory, and maple are ideal choices as they are more durable and have a higher chance of creating a coal.
Preparing the spindle and fireboard
After selecting the appropriate wood, you need to prepare your spindle and fireboard. The spindle should be straight and about the thickness of your thumb. Cut it to a length that extends beyond the width of the fireboard. The fireboard should be flat and about the size of your hand. Cut a notch in the fireboard near the edge that will hold the spindle in place.
Constructing the bow
The bow is used to spin the spindle and create friction against the fireboard. To make a bow, select a flexible branch that is about the length of your arm. Tie a cord to each end of the bow, leaving enough slack to create tension when you hold it.
Crafting the bearing block
The bearing block is used to hold the top of the spindle in place while you rotate the bow. It is usually made from a harder wood than the spindle and fireboard. Select a piece of wood that is about the size of your palm and carve a shallow depression in the center where the spindle will rest.
Gathering suitable tinder
To create a fire, you need to have suitable tinder. This can be dry grass, leaves, or bark that is shredded into small pieces. You can also use materials like cotton balls, dryer lint, or char cloth. These materials are highly combustible and will quickly ignite when you blow on them after creating an ember.
Choosing the right materials for your bow drill is crucial for fire-making success. Selecting appropriate wood for the spindle and fireboard, preparing them properly, constructing the bow, crafting the bearing block, and gathering suitable tinder are all critical steps in the process. With practice and patience, you can master the art of creating fire with a bow drill.
Making a Bow Drill
If you’re looking to start a fire in a survival situation or just want to learn a new skill, making a bow drill is a great place to start. A bow drill is a primitive fire-starting tool that uses friction to create heat and ultimately start a fire. We’ll walk you through the step-by-step process of making a bow drill and using it to start a fire.
Preparing Your Components
Before you can start making a bow drill, you’ll need to gather the necessary components. Here’s what you’ll need:
- A spindle: This is the part of the bow drill that you’ll spin to create friction with the fireboard. It should be straight and about 8-10 inches long and about the thickness of your thumb.
- A fireboard: This is the base of the bow drill that the spindle will spin against. It should be flat and about 12-16 inches long and about 1-2 inches thick.
- A bow: The bow is used to spin the spindle. It should be about as long as your arm and should have a string that is tied tightly between the two ends.
- A socket: This is a small piece of wood or stone that you’ll use to apply pressure to the spindle as it spins. It should fit comfortably in the palm of your hand.
Assembling the Bow Drill
Once you have all of your components, it’s time to assemble the bow drill. Here’s how:
- Start by notching the fireboard. Cut a small notch in the edge of the fireboard where you’ll place the spindle. This will help to collect the sawdust that’s created as you spin the spindle.
- Next, place the fireboard on a flat surface and hold it steady with your foot or by placing a heavy object on top of it.
- Take the spindle and place one end in the notch on the fireboard.
- Hold the spindle upright with one hand and use the other hand to place the socket on top of the other end of the spindle.
- Start to spin the spindle back and forth by moving the bow back and forth along the string.
- Apply downward pressure to the socket as the spindle spins.
- Continue spinning the spindle until you create an ember.
Positioning Yourself for Proper Technique
Positioning yourself correctly is key to making a successful bow drill. Here’s how to do it:
- Sit on the ground with your legs crossed and the fireboard between your legs.
- Hold the fireboard steady with your feet or a heavy object.
- Hold the bow with your dominant hand and the spindle with your non-dominant hand.
- Place the socket on top of the spindle and apply pressure with your dominant hand.
- Use your other hand to move the bow back and forth along the string.
- Keep your elbows close to your body for stability.
Drilling and Creating an Ember
Now that you’re in the correct position, it’s time to start drilling and create an ember. Here’s how:
- Start to spin the spindle back and forth by moving the bow back and forth along the string.
- Apply downward pressure to the socket as the spindle spins.
- As you spin the spindle, sawdust will begin to collect in the notch on the fireboard.
- Keep spinning the spindle until the sawdust starts to smoke.
- Once you see smoke, continue spinning the spindle until an ember forms.
Tips for Success

Making a fire with a bow drill is a primitive but effective technique that has been used for centuries. While it may seem simple in theory, it takes practice and knowledge to master. We will cover some valuable tips for success to help you make a bow drill that can start a fire in any situation.
Practicing the Bow Drill Technique
The key to success with a bow drill is practice. Here are some tips to help you perfect your technique:
- Use the right materials: Your bow drill kit should consist of a spindle, a fireboard, a bearing block, and a bow. Choose the right materials to ensure that your kit works effectively.
- Find the right grip: Hold the spindle between your palms with your fingers wrapped around it. Apply downward pressure as you rotate the spindle.
- Keep a steady pace: Maintaining a consistent pace and pressure is crucial to creating enough friction to generate an ember. Don’t rush or slow down; find a pace that works for you and stick with it.
- Keep the spindle straight: Make sure the spindle stays straight as you rotate it. If it wobbles, it will create less friction, making it harder to start a fire.
- Use your body weight: Push down on the spindle with your body weight to create more friction. This will help generate heat faster, making it easier to create an ember.
Adapting to Different Environments and Materials
Different environments and materials can affect your success with a bow drill. Here are some tips for adapting to these conditions:
- Adjust your technique: Different materials require different techniques. For example, if you’re using a softwood like cedar, you’ll need to apply less pressure than if you’re using a hardwood like oak.
- Pay attention to the weather: Humidity and temperature can affect your success with a bow drill. If it’s humid, your materials may be damp, making it harder to create an ember. If it’s cold, your materials may be more brittle, making them harder to work with.
- Try different materials: Experiment with different types of wood and other materials to find what works best for you. You might find that some materials work better in certain environments, or that some are easier to work with than others.
- Build a shelter: If it’s raining or windy, you’ll need to protect your bow drill kit from the elements. Build a shelter or find a dry place to work to increase your chances of success.
Alternative Fire-Starting Methods
While making a bow drill is a great way to start a fire, it can be a time-consuming and physically demanding process. Luckily, there are alternative fire-starting methods that are easier to use and require less physical effort. We will explore some of the most effective alternative fire-starting methods that you can use in a survival situation.
Hand Drill
The hand drill method is one of the oldest and simplest fire-starting techniques. It involves rubbing a wooden spindle against a wooden baseboard to create friction, which generates heat that ignites the tinder. To use this method, you’ll need a wooden spindle, a wooden baseboard, and some tinder.
To make a hand drill, you’ll need to find a straight, dry stick that is about 2 feet long and 1 inch in diameter. Cut a small notch into the center of the baseboard and insert the end of the spindle into it. Place some tinder in the notch, and then begin to rub the spindle back and forth between your palms to generate friction. Keep rubbing until the tinder ignites.
Flint and Steel
Flint and steel is another ancient fire-starting technique that is still used today. It involves striking a piece of flint against a piece of steel to create sparks, which ignite the tinder. To use this method, you’ll need a piece of flint, a piece of steel, and some tinder.
To create sparks, hold the steel at an angle and strike it against the flint, directing the sparks onto the tinder. You may need to strike the flint several times before the sparks ignite the tinder. Once the tinder begins to smolder, blow on it gently to help it ignite.
Fire Piston
A fire piston is a small device that uses compressed air to ignite tinder. It consists of a hollow cylinder with a piston that fits tightly inside. To use a fire piston, you’ll need some tinder and a fire piston.
To ignite the tinder, place a small piece of char cloth or other tinder in the end of the cylinder. Push the piston down quickly and firmly, compressing the air inside. This generates heat, which ignites the tinder. Once the tinder begins to smolder, blow on it gently to help it ignite.
While the bow drill is a great way to start a fire, it’s not the only option. The hand drill, flint and steel, and fire piston are all effective alternative fire-starting methods that you can use in a survival situation. By mastering these techniques, you’ll be able to start a fire even in the most challenging conditions.
Conclusion (How To Make A Bow Drill)
Crafting a bow drill requires two sticks, one for the bow and one for the drill. Create a small notch in the drill and use the bow to rotate the drill back and forth. The friction generates heat and produces a coal that can be used to ignite a fire.
In wrapping up our bow drill journey, we’ve explored the art of crafting fire with simple tools and techniques. Remember, patience is your best friend here. Through steady hand movements and a touch of finesse, you can coax life from seemingly lifeless materials.
So, next time you find yourself in the wild, surrounded by nature’s embrace, you now possess the knowledge to spark warmth and light. This ancient method bridges our modern world with the skills of our ancestors. Let the whisper of friction and the dance of sparks remind you of the primal connection we share with the elements.


