

Are you tired of using a bowling ball that doesn’t fit your style and grip? Do you want to take your game to the next level and achieve those perfect strikes? If so, you’ve come to the right place.
How to Drill a Bowling ball? Drilling a bowling ball requires specialized equipment and knowledge. Start by measuring your hand and determining your desired grip.
Choose a layout that complements your playing style. Finally, let a professional drill your ball to ensure it’s done correctly.
In this blog, we’ll guide you through drilling a bowling ball. By the end, you’ll have a customized ball that fits your hand and plays like a glove.
So, let’s get started and elevate your bowling game to new heights.
Types of Bowling Ball Drilling Layouts
One of the most essential factors in bowling is having the right fit for your ball. This includes the drilling layout, which determines how your fingers and thumb grip the ball.
There are several types of drilling layouts, each with advantages and disadvantages.
Conventional grip
The conventional grip is the most basic and traditional way of drilling a bowling ball. The thumb goes into the ball, while the fingers are only inserted up to the second knuckle.
This provides a secure and stable grip on the ball, making it ideal for beginners or those with weak wrists.
Fingertip grip
The fingertip grip is serious bowlers’ most common and popular type of drilling layout.
With this layout, the fingers are inserted into the ball only up to the first knuckle, allowing for greater ball control and more hook potential.
This grip is ideal for bowlers who want to achieve a powerful hook shot but require more strength in the fingers and wrist to maintain control of the ball.
Bowlers using a fingertip grip often use finger inserts to ensure a consistent fit and prevent slippage.
Semi-fingertip grip
The semi-fingertip grip is a hybrid between the conventional and fingertip grips. The fingers are inserted slightly more deeply than the traditional grip, but not as far as the fingertip grip.
This allows for greater control and hook potential than the conventional grip, but with less strain on the wrist than the fingertip grip.
Bowlers who prefer a more versatile grip may opt for the semi-fingertip grip.
However, it can be more challenging to achieve consistency with this type of grip, as the exact placement of the fingers can vary.
Choosing the proper drilling layout is crucial for optimal performance in bowling.
The traditional grip is best for beginners or people with weak wrists. The fingertip grip, on the other hand, is chosen by more experienced bowlers who want to hook the ball more often.
The semi-fingertip grip balances the two and is a good choice for versatile bowlers.
It’s essential to work with a professional to determine the best drilling layout for your skill level and style of play.
Necessary Tools and Equipment
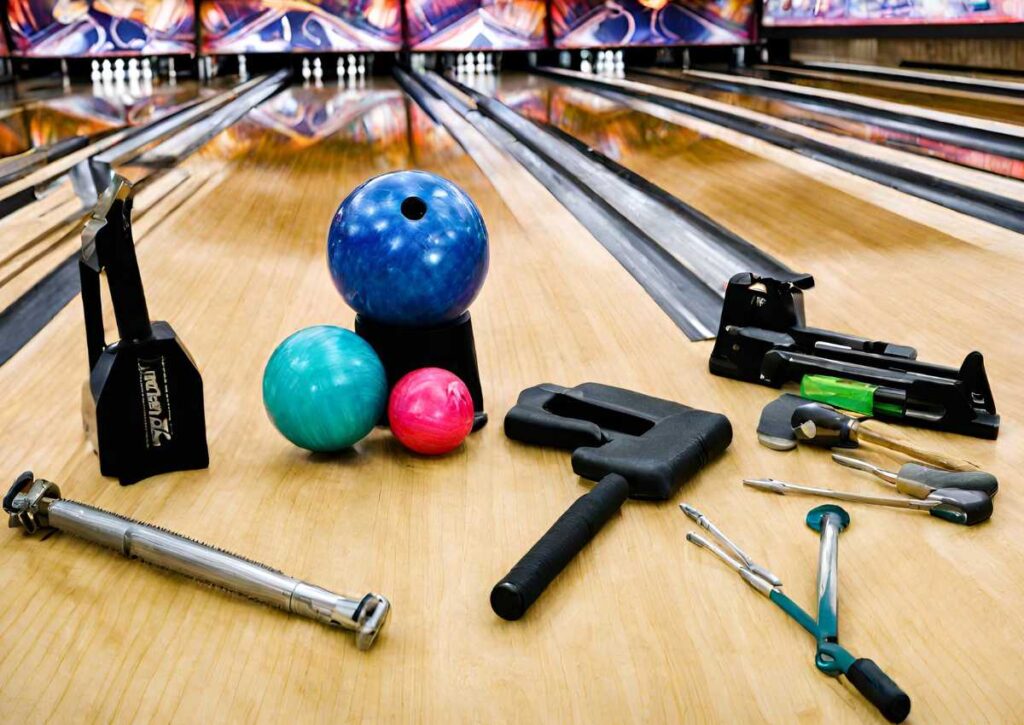
If you want to drill your own bowling ball, there are several tools and equipment that you will need to get the job done right.
Some of these tools are essential to the process, while others can make the job easier and more efficient.
We will review the necessary tools and equipment to drill a bowling ball, including a bowling ball drill press, measuring and marking tools, drill bits and hole saws, and safety equipment.
Bowling ball drill press
A drill press is the most essential tool for drilling a bowling ball. This machine is specifically designed to drill holes into bowling balls; it is necessary to have one if you plan to drill your own ball.
Many different models and brands of bowling ball drill presses are available, so choosing one that meets your needs and budget is essential.
When shopping for a bowling ball drill press, look for one that is sturdy and stable, with a powerful motor, drill bits, and hole saws.
Some of the top brands of bowling ball drill presses include Jayhawk, Innovative, and KMT.
Measuring and marking tools
To ensure that the holes you drill in your bowling ball are accurate, you must use measuring and marking tools.
These tools help you draw the exact location of each hole before drilling, which is essential to ensuring that your ball fits your hand correctly.
Some of the most common measuring and marking tools for drilling bowling balls include a ball measuring calliper, a pencil, a ruler, and a protractor.
These tools allow you to measure the diameter and depth of each hole, mark the location of each spot on the ball, and ensure that each hole is drilled at the correct angle.
Drill bits and hole saws
Another essential tool to drill a bowling ball is a set of drill bits and hole saws.
These tools are used to drill the actual holes in the ball, and they come in various sizes and shapes to accommodate different hand sizes and grip preferences.
When choosing drill bits and hole saws, look for high-quality, durable tools for drilling into bowling balls.
Some of the most popular brands of drill bits and hole saws for bowling balls include Vise, Turbo, and Ebonite.
Safety equipment
Last but certainly not least, having the proper safety equipment when drilling a bowling ball is essential. This includes eye protection, gloves, and a dust mask.
Wearing gloves can help protect your hands from cuts and abrasions while handling the ball and the drill bits. Finally, eye protection is essential to prevent eye injuries from flying debris.
Having the right tools and equipment is essential when drilling a bowling ball.
Measuring Your Hand for a Custom Fit

When drilling a bowling ball, getting the right fit is essential for achieving the best results.
A custom fit ensures the ball feels comfortable in your hand and gives you better control and accuracy over your shots.
One of the critical factors in achieving a custom fit is measuring your hand correctly.
Also, check out: How Much Does It Cost To Drill A Bowling Ball?
Span Measurement
The first measurement you need to make is the span measurement. The span is the distance between the tips of your middle finger and your thumb when they are spread apart as wide as possible.
To take this measurement, you can use a span ruler, a specialized tool for measuring a span. Place your hand on the ruler with your fingers spread apart, and take note of the measurement.
Finger Hole Sizes
Once you have the span measurement, you can determine the size of the finger holes. Finger holes come in standard sizes, ranging from 11/16 inches to 1 1/8 inches.
The size you need will depend on the measurement of your fingers.
Typically, a finger hole should be about 1/16 inch larger than the size of your finger to allow for a comfortable fit.
Thumb Hole Size
In addition to the finger holes, you also need to measure the thumb hole size. The thumb hole is drilled slightly larger than the finger holes to allow easy ball release.
To calculate the thumb hole size, you can use a thumb hole slug, a specialized tool designed for measuring thumb holes. Place the slug on your thumb and take note of the size.
Marking the Bowling Ball

After selecting the right bowling ball, the next step is to mark it properly. Marking the ball will allow you to determine its centre of gravity and layout pattern.
Marking the finger and thumb holes in the right place is crucial for a good grip and a consistent release. We will discuss how to mark your bowling ball correctly.
Finding the centre of gravity
A bowling ball’s centre of gravity (CG) is the point within the ball where it will naturally rest. Finding the CG is crucial for a good layout pattern.
To find the CG, you can use a bowling ball locating device available at most pro shops.
Place the ball on the device and let it settle. The device will locate the CG by indicating where the ball balances. You can mark this point with a piece of chalk or a sticker.
If you don’t have access to a locating device, you can use the “eyeball” method. Hold the ball with two fingers and let it hang freely. The CG will be where the ball settles between your fingers.
Determining the layout pattern
Once you have found the CG, the next step is determining the layout pattern. The layout pattern refers to the position of the finger and thumb holes relative to the CG.
A good layout pattern can help you achieve the desired ball motion and increase your chances of making strikes.
You can use a layout ball or a bowling ball spinner to determine the layout pattern. These tools will help you mark the position of the finger and thumb holes based on the desired layout pattern.
Alternatively, you can use a layout sheet that shows different layout patterns and their corresponding ball motions. Choose a layout pattern that suits your playing style and skill level.
Marking the finger and thumb holes
After determining the layout pattern, the next step is to mark the finger and thumb holes. The holes should be placed precisely on an excellent grip and a consistent release.
You can use a bowling ball drill press or a hand-held drill to mark the holes. Use the correct drill bit size for your fingers and thumb.
The thumb hole should be slightly larger than the thumb, while the finger holes should be positioned according to the chosen layout pattern.
Use a ball plug to fill any mistakes or unwanted gaps.
Drilling Process
Drilling a bowling ball can be daunting, but with the right tools and techniques, you can easily customize your ball to fit your specific needs.
We’ll look at the step-by-step drilling process, from securing the ball to fine-tuning and finishing touches.
Securing the Bowling Ball
Before you begin drilling, securing the bowling ball in place is essential. You can use a ball jig, a particular device, to hold the ball in place during drilling.
Alternatively, you can use a vise, a stationary tool that clamps onto the ball. Ensure the ball is secured tightly to prevent it from moving during drilling.
Drilling the Finger Holes
The first step in drilling the ball is to create the finger holes. Start by measuring the space between your fingers and marking the ball accordingly.
Next, use a drill bit that’s the appropriate size for your finger holes. It’s essential to use a sharp drill bit and to keep it lubricated throughout the drilling process.
Slowly drill the holes, being careful not to apply too much pressure, as this can cause the ball to crack.
Drilling the Thumb Hole
After drilling the finger holes, it’s time to drill the thumb hole. Start by marking the spot where you want the thumb hole to be.
Use a drill bit appropriate for the size of your thumb, and drill slowly and carefully.
Creating a smooth, rounded edge around the thumb hole is essential to prevent it from catching on your thumb during use.
Fine-tuning and Finishing Touches
Once all of the holes are drilled, it’s time to fine-tune the ball to ensure it’s perfectly balanced.
You can use a ball spinner to do this, which will help you adjust the weight distribution and smooth out any rough spots.
Finally, add any finishing touches, such as beveling the edges of the holes or sanding down any rough spots.
This will ensure that your ball is ideally suited to your game and give you the best possible results on the lanes.
Conclusion
After going through the steps of drilling a bowling ball, you may wonder why it’s worth the effort.
The answer is simple: a custom-drilled bowling ball can provide many benefits that a pre-drilled ball cannot. We’ll explore some advantages of drilling a bowling ball specifically for you.
From improved accuracy to increased comfort, you’ll discover why investing in a custom-drilled bowling ball is well worth it for any serious bowler.
So, let’s dive in and explore the benefits that a custom-drilled bowling ball can offer.
Related post: How Long Does It Take To Drill A Bowling Ball?
FAQs
What is the ideal grip for a bowling ball?
The ideal grip is one that offers comfort and control. A fingertip grip, where the fingers go into the ball up to the first knuckle, is commonly preferred by many bowlers due to its enhanced control and release.
How do I determine the right drilling layout for my bowling ball?
The drilling layout depends on your bowling style, hand position, and desired ball reaction.
Consulting with a pro-shop professional who considers your style and preferences is crucial in determining the best layout.
Can I drill my own bowling ball at home?
While it’s possible, it’s highly recommended to have a professional driller do it.
They have the expertise, specialized equipment, and knowledge to ensure the holes are drilled accurately for your specific needs.
How often should I consider redrilling my bowling ball?
Redrilling might be necessary if your hand size or technique changes significantly.
Otherwise, unless there’s damage or a specific need for a layout change, it’s advisable to avoid excessive redrilling, as it can weaken the ball.
What should I consider before getting a bowling ball drilled?
Consider factors such as your bowling style, hand size, speed, and the lane conditions you frequently encounter.
Discussing these elements with a pro shop expert helps in choosing the right drilling and ball specifications for optimal performance.


