


Are you going to do an electrical job yourself? You might be curious about what size hole a 12/2 Romex needs. You’re in luck because I know the answer!
What Size Hole To Drill For 12/2 Romex? When drilling for 12/2 Romex, aim for a hole around 1 inch in diameter—not too big, not too small.
This snug fit ensures a safe passage for the cable without compromising your wall or ceiling.
Read on to find out what size hole you need and how damaging it can be to use the wrong size.
This blog will talk about the question of what size hole 12/2 Romex needs. Romex is a type of nonmetallic wire that is often used for wiring homes.
Before you install Romex, ensure you know what size hole you need to make. This is important for both the safety and the usefulness of the wiring. Let’s get into the specifics now.
Understanding The Sizes Of Cables
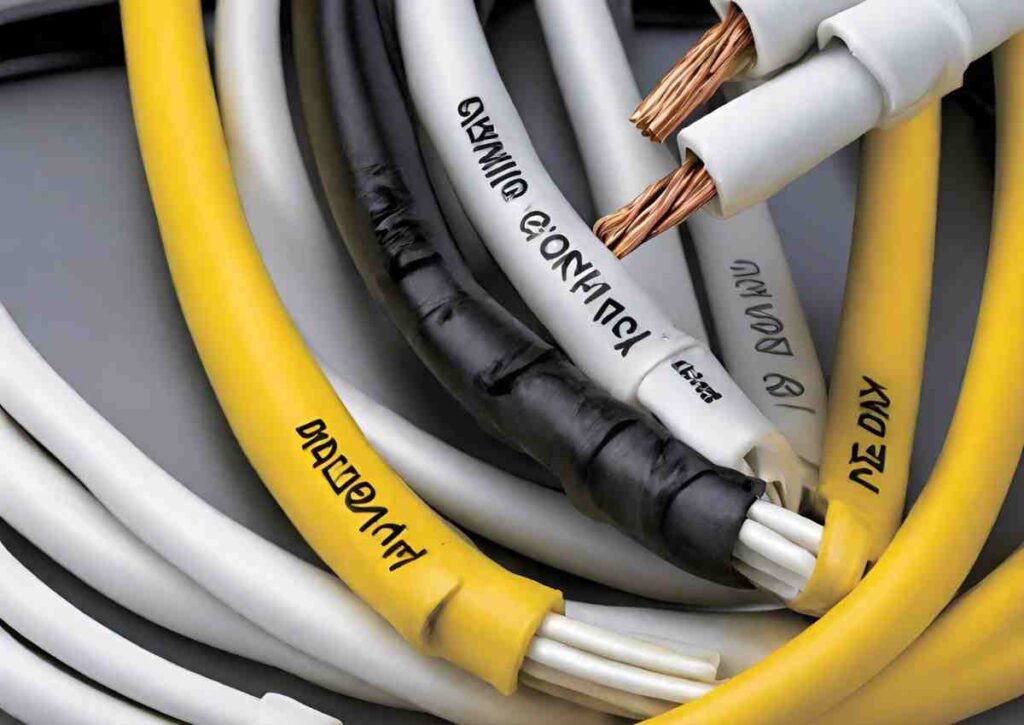
Knowing the size of the 12/2 Romex wire is essential before discussing hole sizes. The number “12/2” tells you how thick the wire is and how many conductors it has.
This kind of Romex has two 12-gauge conductors. It is usually used in homes for lights and other general-purpose electrical circuits.
Figuring Out What The 12/2 Romex Is For
12/2 Romex is made for working with electricity in various ways in homes.
This type of wire is often used for lighting fixtures, outlets, switches, and other home circuits that need to carry more power.
The wire comprises two insulated conductors, one bare grounding conductor, and an extra-insulated conductor.
The bare grounding conductor improves electrical safety by allowing fault currents to flow.
Hole To Drill For 12/2 Romex
What size hole should you drill for a 12/2 Romex? That’s the main question. For 12/2 Romex, you need to hit a spot at least 1.25 inches across.
This makes sure the wire can go through safely and meets the rules. But why does the hole’s size matter so much?
How Important Hole Size?
For many reasons, the hole’s size is significant. Before anything else, it ensures that the hole is big enough to fit the wire, which keeps it safe and secure.
Pulling the Romex through the wall might be easier if the gap is more significant.
But it’s essential to follow the 1/3 rule. This rule says the hole shouldn’t be more significant than one-third of the framing’s width.
This ensures that the structure is strong enough to hold the weight of the wires and prevents damage from happening.
What Is the Maximum Hole Diameter for 12/2 Romex?
The 1/3 rule says that the most significant hole diameter for a 12/2 Romex is 1 1/8 inches. This means that nails and wallboard will not be able to reach the wire itself by 1 1/8 inches.
But remember that a 2×4 is 3 1/2 inches wide, so leave at least 1 1/4 inches of space between the hole’s edge and the stud you’re drilling into.
A half-inch drill bit is fine, but for easy pulling and better safety, you should use one with a 9/16-inch or larger diameter.
The Rule of 1/3 for Hole Size
When cutting holes for 12/2 Romex wire, the 1/3 rule is essential. It says the hole’s width should be one-third of the wire’s diameter.
This rule makes the wire safer because it is now protected from nails and wallboards. But it’s important to remember that the 1/3 rule is just a suggestion.
When choosing the hole size, you should also consider power, use, length, temperature, and the number of wires in the conduit.
Recommended Hole Diameter for 12/2 Romex
For 12/2 Romex, a hole depth of 7/8 inches is usually the best choice. This makes enough room for the Romex to fit through while keeping nails and other sharp items out of the way.
When running two or more wires, you usually need a 3/4-inch hole to make room for them.
When putting up drywall, a 1/2-inch hole is best for one Romex wire, and a 3/4-inch hole is best for two or more cables.
Using a bigger hole diameter than you need can be helpful, like making it easier to pull the cable.
NEC Codes for Wiring Hole Size
The National Electric Code (NEC) clarifies how to wire things that others will see.
In this case, the NEC says that up to nine 12-gauge lines can be used with 1/2-inch conduit. In the same way, you can use up to 12 of the 14-gauge lines.
Also, if you use a 2×4 board, the hole size needs to be at least 1 1/4 inches from the board’s edge.
This ensures enough space for wires and follows the rules set by building codes. The NEC also says that holes in through-joists can be one-third of the board’s depth at most.
These rules make sure that all building projects have safe and good wiring.
Why using a bigger hole diameter is a good idea
When installing 12/2 Romex, using a bigger hole diameter can be helpful in several ways.
It first cuts down on the force needed to pull the wires through, which makes the job easier and faster.
It also makes it more likely that all four lines can fit through the hole without blocking it.
Lastly, a bigger hole diameter might mean fewer nails and wall anchors will get in the way of the wire’s defense, making your wiring system even safer.
How to Do Drilling

It’s essential to use the right tools and methods when making holes for Romex to get a clean and accurate spot. These are the best ways to do things:
1. How to Choose the Right Drill Bit
Pick out the right drill bit to make holes for Romex. For this job, spade or drill bits work well because they are made to make bigger holes in wood, which is perfect for putting Romex through studs and joists.
2. Getting the drill ready
Ensure the drill works right and the spade or drill bit fits in it. Ensure the drill’s battery or other power source has enough power to finish the job without stopping.
3. Putting marks on the drilling spots
Mark the exact spots where the holes need to be made before you start digging. Make points on the surface that are easy to see with a pencil or a marker.
Markings that are put correctly ensure accuracy when drilling and keep you from making mistakes that aren’t necessary.
4. Putting the drill in place
Place the drill bit on the spot that has been marked to make the hole. Ensure the drill is held firmly and straight across from the drilled area. This creates a hole that is straight and exact.
5. Getting the hole ready
Set the drill’s speed low to make a test hole. This pilot hole will help the giant spade or drill bit find its way and keep it from going off track.
To finish drilling, slowly speed up the machine after the test hole is made.
6. Checking on Progress
Keep the pressure on the drill steady as you drill to ensure the hole is smooth and clean. Do not use too much force, which could cause the wood to split or chip.
7. On the Lookout for Rough Edges
Check the sides for rough or jagged spots once the hole is drilled. You can smooth out any rough bumps with sandpaper or a tool.
8. Keeping the Right Spacing
If you’re drilling more than one hole for different wires, ensure enough space between each one.
When there is enough space between the cables, they don’t rub against each other. This lowers friction and the chance of long-term cable damage.
9. Making sure cables are safe
After the holes are drilled, carefully put the Romex wire through them. Be careful not to snag or kink the line during this step, as this could damage its structure.
10. Putting the Romex cable in place
After putting the Romex through the holes you made, use approved cable staples or other approved cable management tools to keep the cable in place along its path.
Good security stops things from moving around too much and lowers the chance of damage from shocks or outside forces.
In conclusion
To summarize, 12/2 Romex needs a hole in the ceiling or wall for the wire to go through.
The spot must be the right size—it should be big enough for the wire but not so big that it damages the wall or ceiling.
The giant hole that can be made for 12/2 Romex is 1-1/4 inches, but for safety reasons. It’s better to use a width of just 1 inch.
A bigger hole width may help with cable management, but it also makes it more likely that the wall or ceiling will get damaged.
It is best to use a drill bit or knockout punch instead of another tool when making a hole for the 12/2 Romex.
You’re now ready to go! Remember to measure twice and cut once to ensure the lines are intact.
When working with electrical wires, it’s essential to put safety first and follow the rules. Make sure you know what you’re doing and have the right tools before drilling that hole!
FAQs
Can I use any drill bit size to make a hole for 12/2 Romex?
No, it’s essential to choose the right drill bit size. For 12/2 Romex, use a bit that’s around 7/8 inch or 1 inch in diameter. This ensures a proper fit without damaging the cable.
Why is the hole size important when installing a 12/2 Romex?
The hole size matters because it should be large enough for the cable but not so big that it weakens the wall or ceiling.
Following the guidelines helps keep the installation safe and secure.
Can I use a regular drill to make holes for Romex?
Yes, you can use a regular drill, but it’s crucial to use the right drill bit.
Choose a spade or auger bit designed for creating larger holes in wood, suitable for running Romex through studs and joists.
What happens if I choose a hole size larger than recommended for 12/2 Romex?
Opting for a larger hole may offer benefits like smoother installation, but it also increases the risk of damage to the wall or ceiling.
It’s recommended to stick close to the recommended sizes for safety.
How do I ensure my 12/2 Romex installation meets safety standards?
Always adhere to local electrical codes and regulations. Measure twice before drilling, use the recommended hole size, and secure the Romex properly.
If uncertain, seek guidance from a certified electrician for a safe installation.


